Quick VLAN Walkthrough
VLAN Operation and Network Applications 12-17
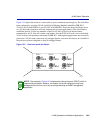
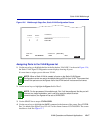
Figure 12-6 Walkthrough Stage One, Static VLAN Configuration Screen
Assigning Ports to the VLAN Egress list
1. Use the arrow keys to highlight the line in the list that has VLAN ID 2. As shown in Figure 12-6,
the Static VLAN Egress Configuration screen displays showing all ports.
It is now time to assign a port to this new VLAN.
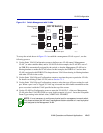
2. Use the arrow keys to highlight the Egress field of Port 3.
3. Use the SPACE bar to step to UNTAGGED.
4. Use the arrow keys to highlight the SAVE command at the bottom of the screen. Press ENTER.
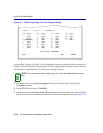
Port 3 is added to the Egress list of VLAN 2 with a frame format of UNTAGGED. The screen
should now look like Figure 12-7.
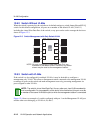
NOTE: When a Static VLAN is created, all ports on the Static VLAN Egress
Configuration screen
are set to the default setting of NO for that VLAN. This means that
none of the ports are on the Egress list for that VLAN and will not transmit its frames.
NOTE: For the purposes of this walkthrough, Port 3 will be configured. As this port will
connect to a single workstation, and is not to be used for switch-to-switch
communications, the Egress will be set to UNTAGGED.
30691_63
RETURN
ADD EXIT
NEXT
VLAN ID
1
2
FDB ID
1
2
VLAN Name
Default VLAN
Test VLAN
VLAN ID: 2 VLAN Name: [ Test VLAN ]
DEL MARKED


