19
Positioning the Image
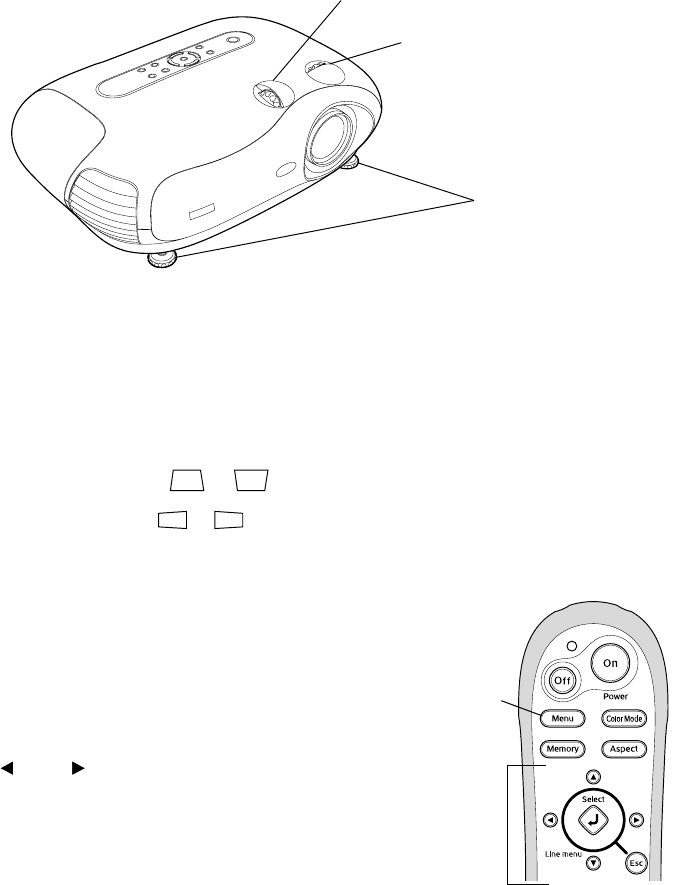
If the image is not centered on the screen, use the horizontal and vertical lens shift knobs to
adjust its position.
Note: You can display a test pattern to facilitate adjustment. Press the Pattern button on the
remote control, then select Cross-hatching.
If you still need to raise the height of the image after using the vertical lens shift knob, lift the
front of the projector and rotate the adjustable feet until the image is positioned correctly.
You can also use the feet to correct the angle of the image if it’s tilted.
Performing Keystone Correction
If the projected image looks like or , use the Keystone function to correct its shape.
Note: If the image is shaped like or , the projector has been placed off to the side of the
screen and angled toward it. Face the projector straight ahead (instead of at the center of the
screen), then use the horizontal lens shift knob to center the image.
To perform keystone correction:
1. Press the
Menu button on the remote control.
2. Use the menu navigation buttons to open the
Setting
menu, then open the
Screen menu, and then select
Keystone.
3. Use the arrow buttons to adjust the shape of the
image.
4. Press the
Menu button when done.
Adjustable feet
Vertical lens shift knob
Horizontal lens shift knob
Menu
button
Menu
navigation
buttons
