


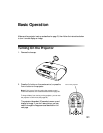


29
Adjusting the Image Quality
Before fine-tuning the image using these adjustments, make sure you have already selected the
best Color Mode for your picture and viewing environment, as described on page 24. The
Color Mode adjusts various settings to approximately correct levels, simplifying your
adjustment of the picture.
Most image quality settings are saved independently for each input source (Video, S-Video,
Input A, Input B). After you finish adjusting the settings for one input source, be sure to
switch to each additional input source you’ll be using and make any necessary adjustments.
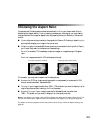
Brightness and Contrast Settings
The Brightness setting controls how much light is produced by the projector lamp, and the
other settings listed below control how the projector interprets the light and dark areas of
the picture.
Adjust the Brightness first, then fine-tune the image with the other settings, as described.
■ Brightness
Adjust the brightness so it’s suitable for your viewing conditions. For example, if you’re
projecting in a brightly lit room or onto an especially large screen, you may need to
increase the brightness. Decrease the brightness for dark rooms or small screens; this also
reduces power consumption and fan noise, and helps to prolong the life of the lamp.
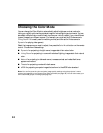
■ Setup Level
For compatibility with most video equipment sold in the United States, set to 7.5%. This
adjusts the threshold at which dark areas of the image are rendered black. Check your
video equipment’s specifications to be sure of the correct setting.
■ Input Level/Contrast
Adjust the Input Level to set the overall brightness of the image. Then adjust the contrast,
as needed.
If you cannot access the Input Level and Contrast settings, highlight
Input Adjustment
(the first item in the menu list) and press the button, then choose
Input
Level/Contrast
in the sub-menu.
Image ! Picture Quality ! Brightness
Setting ! Advanced ! Setup Level
Image ! Picture Quality ! Input Adjustment ! Input Level/Contrast