


Epson Stylus Photo RX600
2/04 Epson Stylus Photo RX600 - 9
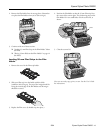
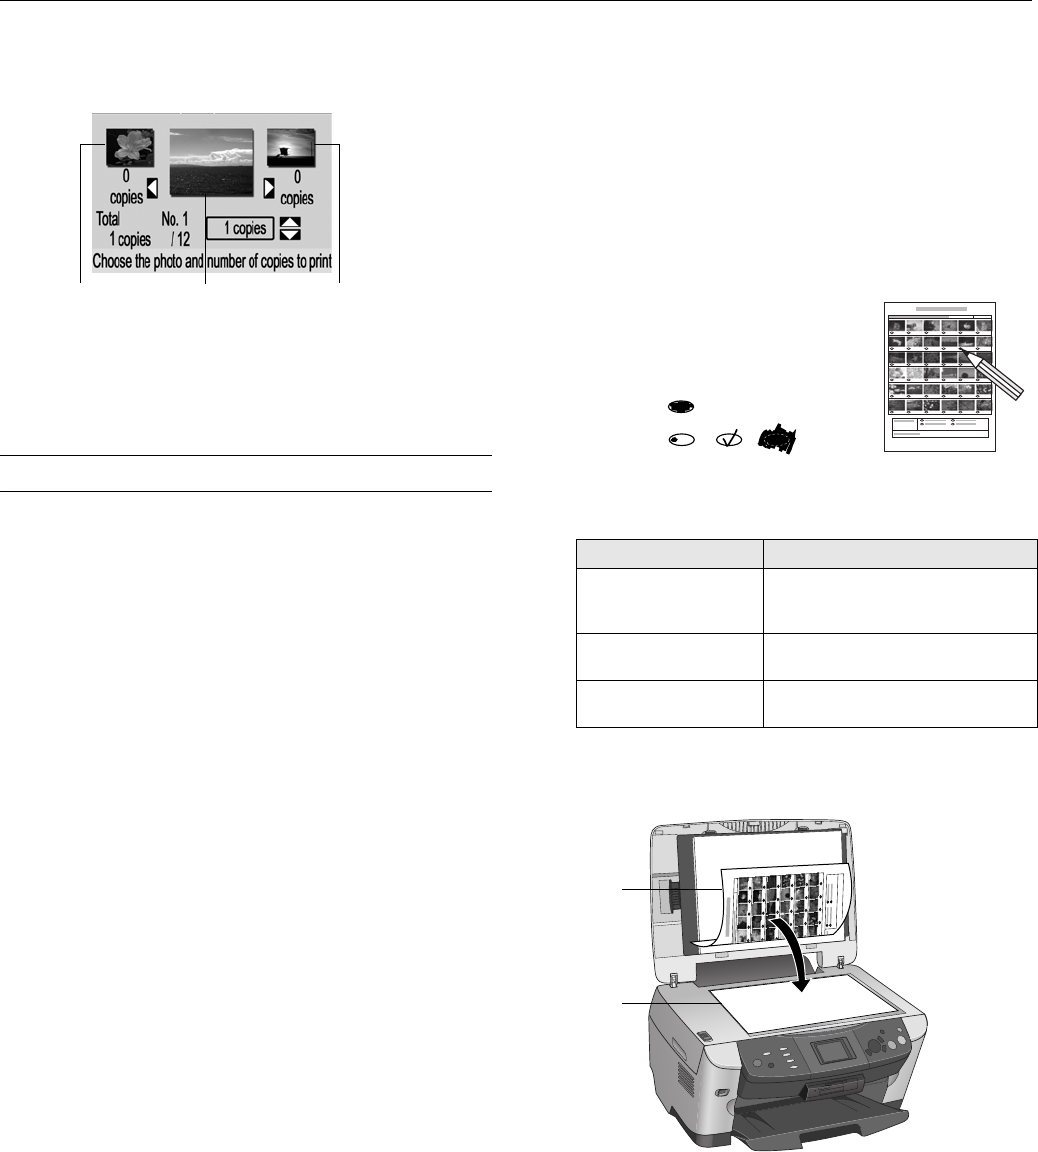
4. Press the OK button. The RX600 screen displays the first,
second, and last photo on the card.
5. Use the l and r buttons to move through the photos.
To select photos for printing, follow the instructions in the
next section.
Printing From a Memory Card
You can print photos directly from your digital camera’s
memory card, without connecting the RX600 to a computer.
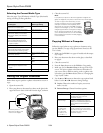
1. Make sure the RX600 is not connected to your computer
(or your computer is turned off) and the RX600 is turned
on.
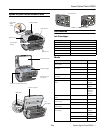
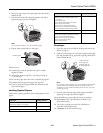
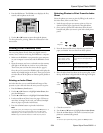
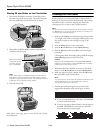
2. Open the memory card cover, and make sure the memory
card light is off and that no cards are in any of the slots.
Then insert your card into the correct slot (see page 4).
Once the card is inserted, the RX600 reads and displays the
number of printable images on the card. Then you can print
an index sheet of all the photos or choose specific photos to
print.
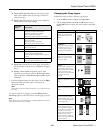
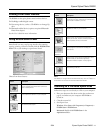
Printing an Index Sheet
An index sheet lets you see small thumbnail images of the
pictures on your card and select the ones you want to print.
1. Press the
Memory Card button.
2. Use the u and d buttons to highlight
Index Sheet, then
press the
OK button.
3. Use the u and d buttons to highlight
Print Index Sheet.
4. Load several sheets of plain, letter-size paper. (If there are
more than 36 images on the card, you will need multiple
sheets of paper to print the index sheets.)
5. Press the x
Color button to print the index sheet.
Note:
To cancel a print job while printing, press the y Stop button. It
may take a little time to process and print the index sheet,
depending on the number of photos on your card. Also, the
RX600 may print several sheets to include all your photos.
Selecting Photos to Print From the Index
Sheet
Select the photos you want to print by filling in the ovals on
the index sheet, then scan the sheet.
1. Load the type of paper you want to print on. You can
choose from the paper types listed in the table below.
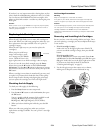
2. Once you have printed the index sheet, fill in the oval
beneath each photo you want to print with a dark pen or
pencil.
3. Near the bottom of the sheet, select the type and size of
paper you loaded. You can select from these options:
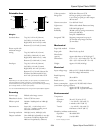
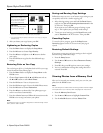
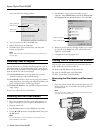
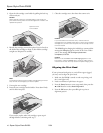
4. Place the index sheet face-down on the scanner glass, so that
the top of the sheet is aligned with the left edge of the glass.
5. Close the scanner lid.
6. Use the u and d buttons to highlight
Scan Index Sheet.
7. Press the x
Color button. The form is scanned and your
photos are automatically printed.
Note:
To cancel a print job while printing, press the y Stop button.
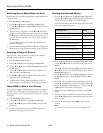
Last First Second
Type and size options For these paper types
Prem. Glossy - 4 × 6
Prem. Glossy - Letter
Prem. Glossy - 8 × 10
Epson Premium Glossy Photo Paper
Epson Premium Semigloss Photo
Paper
Glossy Photo - Letter
Glossy Photo - 4 × 6
Epson Photo Paper
Epson Glossy Photo Paper
Matte - Letter Epson Matte Paper Heavyweight
Epson Double-Sided Matte Paper
OK:
No good:
Left edge
Top of
sheet