


Maintenance 189
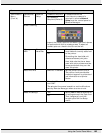
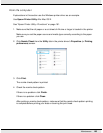
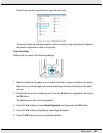
3. Select nozzle rows for cleaning.
Press the l/r buttons to highlight numbers corresponding to check patterns with faint
or missing segments and press the d/u button to select.
You can select multiple nozzle rows.
To select all nozzles, place a check in the box on the left.
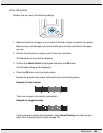
4. Pressing the OK button displays a confirmation message. Press the OK button to start
head cleaning.
A confirmation message is displayed when cleaning is complete.
5. To print a check pattern and check the status of the clog, press the d/u buttons to
highlight Nozzle Check and press the OK button.
To exit without performing a nozzle check, highlight Exit and press the OK button.
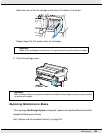
Minimizing Print Misalignments (Head Alignment)
Because there is a small distance between the print head and paper, misalignment may
occur due to humidity or temperature, the inertial force of the print head’s movements, or
by moving the print head bidirectionally. This may result in grainy prints or lines that are
incorrectly placed. When this happens, perform Head Alignment to correct the print
misalignment.
Although Head Alignment can be performed from the computer or the printer, the
alignment procedures differ as explained below.
O From the printer
Head alignment can be performed automatically or manually.
In auto adjustment, the sensor reads the adjustment pattern while it is printing, and
automatically registers the optimum adjustment value to the printer.
Auto head alignment takes about 30 minutes to complete.
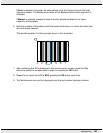
In manual adjustment, you need to check the pattern and enter the optimum adjustment
value for alignment. Manual alignment can be used with cut sheets or other paper that
does not support auto alignment or if auto alignment does not fix the problem
completely.
Printing the pattern for manual head alignment takes from 7 to 11 minutes. The time
required varies with the size of the pattern printed.