


Extender Series • Quick Start Guide
Quick Start Guide — Extender Series, cont’d
QS-2
Maximum
Max. peaking
and gain
Medium – Mid-level
peaking and gain
Normal
Unity
gain
Maximum
Max. peaking
and gain
Medium – Mid-level
peaking and gain
Normal
Unity
gain
Circuit
board
Faceplate
Maximum –
Max. peaking
and gain
Medium –
Mid-level
peaking
and gain
Normal –
Unity gain
Extender D
(viewed
from front)
Extender WM
Extender WM AAP
(viewed from side)
Extender MK, AKM,
AUS, AAP Models
(viewed from rear)
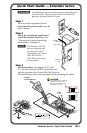
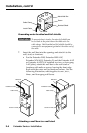
Step 4
Mount all AAPs into faceplates with AAP
openings.
Mount Extender AAP models into wall
plates or faceplates. See “Mounting the
Extender AAP or Extender AAP EX into an
AAP wall plate or
device
faceplate” in
chapter 2.
Extron
Extender AKM MAAP
Line Driver
EXTENDER AKM MAAP
COMPUTER IN
AUDIO IN
#4 - 40 Screws
Installation Cable
Cable
Clamp
Screws or Nails
Wall Stud
#4-40 Nut w/ Captive
Washer
Extron
Extender AAP
AAP 102
AAP 102
EXTENDER
COMPUTER IN
AUDIO IN
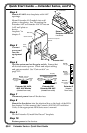
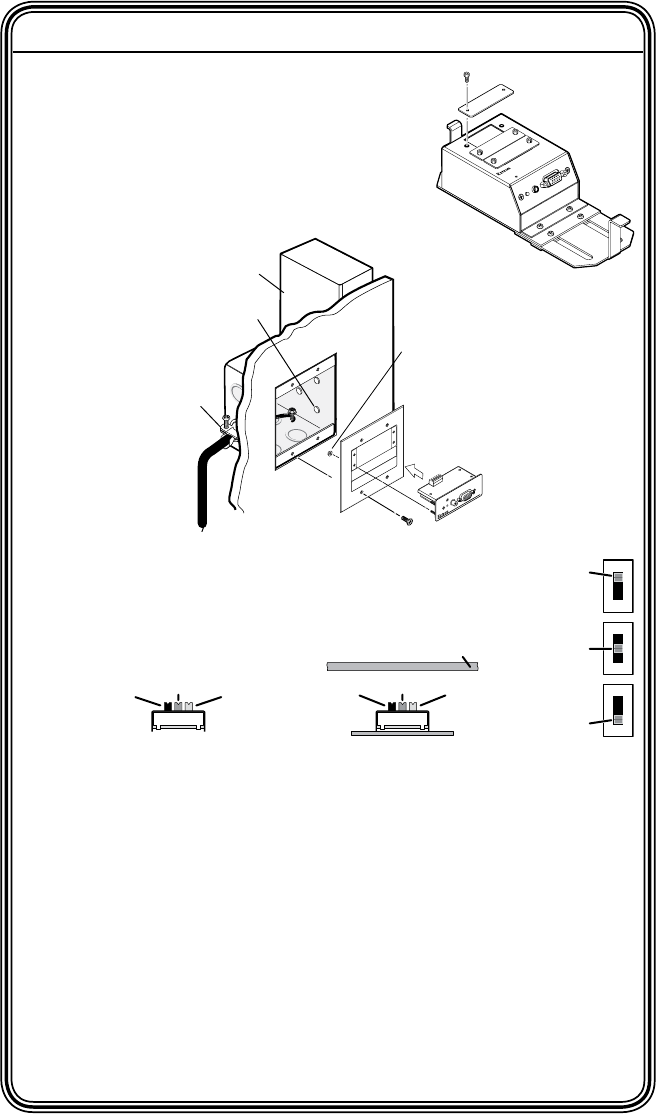
Step 6
Test the system and set the gain switch. Ensure that
all devices receive power. Check and adjust cabling
and gain as needed. See “Gain switch” on
page 2-12.
Step 7
Disconnect power from all the devices.
Step 8
Mount the line driver into the electrical box or the body of the HSA.
See chapter 2 of this manual, the Extender AKM MAAP Installation
Guide, or the appropriate HSA Series user’s manual.
Step 9
For the Extender D, install the Decora
©
faceplate.
Step 10
Restore power to the devices.
Step 5
Connect
power and
turn the
equipment
on.