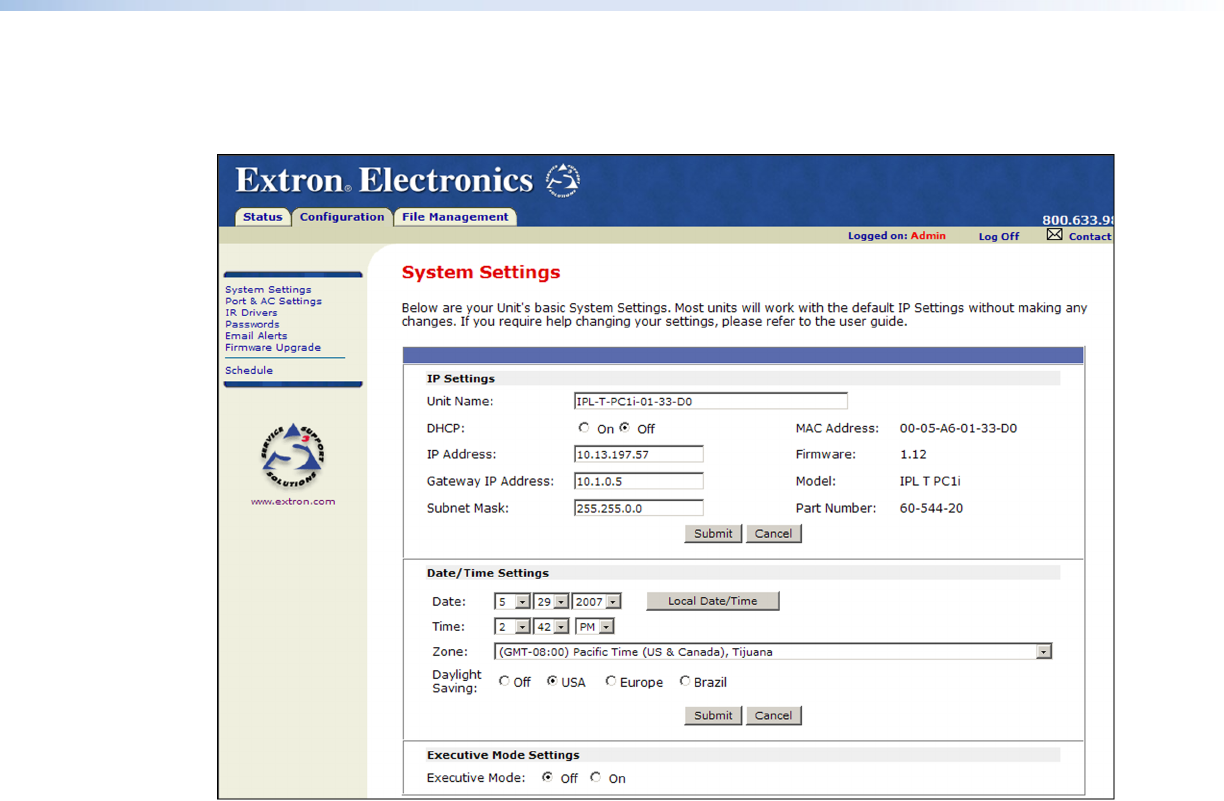
3. Select the Configuration tab, then select System Settings from the sidebar menu
on the left of the screen. The PC1 System Settings page appears, showing the default IP
address.
Figure 15. System Settings Page with Default IP Address
4. Enter the new IP address assigned for the PC1, the corresponding subnet mask, and
gateway address, then click Submit.
IP, gateway, and subnet mask addresses follow standard naming and numbering
conventions and protocol (nnn.nnn.nnn.nnn). Your IP network administrator should
provide the addresses to be used with this interface.
The PC1 can takes up to 2 minutes to store the new settings. When the PC1 IP
address is changed, your computer loses communication with it, and a screen appears,
indicating that the page cannot be displayed.
5. Close the browser.
6. After changing the IP settings of the PC1, restore the original TCP/IP settings to your
computer and reboot it if necessary (see the addresses you wrote down in step 4 of the
“Setting up the Computer for IP communication” procedure, earlier in this section.)
You are now able to access the PC1 web pages to configure the front panel.
IPL T PC1 • HTML Configuration and Control 21
