


The ribbon doesn’t seem to wind or print properly.
Symptoms: The printer skips ribbon panels, prints ribbon panels out of
the usual YMCK order (resulting in strangely colored output), or
simply winds the ribbon until the printerÕs on-line LED light flashes.
¥ Check that the proper ribbon type is installed according to
the ribbon type option selected in QuatroÕs printer driver
setup window (see Chapter 4, Section IV).
¥ The Ribbon Sensor needs to be recalibrated. This is a simple
procedure which may be required every so often. Refer to
the following steps to recalibrate this sensor:
1. Install a Full-Color YMCKO Ribbon into the printer, and
position an unused Magenta (red colored) panel across
the top of the light emitting portion of the Ribbon
Sensor (shown on page 9).
2. Close the Printhead Assembly securely, but leave the
Top Cover open.
3. With the Top Cover open, locate the rectangular
opening on the left-hand side of the printer. Just inside
this opening are four small, white switches aligned
vertically. The switches are labeled 1 through 4, with the
top switch being number 1.
4. With the tip of a small flathead screw driver, flip
Switch 1 towards the rear of the printer to turn the
switch ON.
5. Disconnect the power cable from the back of the printer,
and close the printerÕs Top Cover.
6. Press and hold the on-line button. Then, reconnect the
power cable into the back of the printer while
continuing to hold the on-line button.
7. Release your finger from the on-line button once either
of the printerÕs LED lights turn ON. Notice that only
one LED will be lit, either the on-line or the on/cancel.
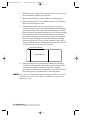
8. On the right-hand side of the printer, locate the three
small holes toward the rear of the Top Cover. Through
the center hole, there is a potentiometer labeled RP2
which adjusts the sensitivity of the Ribbon Sensor.
9. Gently insert the tip of a small flathead screw driver
into the hole so it fits into the slot of RP2. Slightly rotate
RP2 in either direction until both the on-line and
on/cancel LEDÕs turn OFF. (WARNING: RP2 cannot be
rotated all the way around! It has a stopping point in
each direction; DO NOT rotate RP2 beyond these
points!).
Troubleshooting 37
Quatro/510323 v3 1/8/99 10:48 AM Page 37