


Magnum 6K25e Gigabit Fiber Switch Installation and User Guide (10/07)
36
www GarrettCom com
..
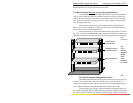
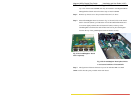
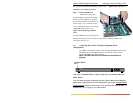
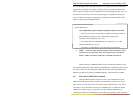
the 4 screws and bracket while holding it down firmly. Figure 3.5.3a: Top View - 6
retaining s crews shown by arrows
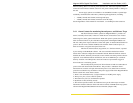
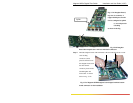
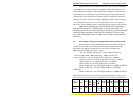
Step 3. Remove 6KPM Card
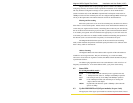
Carefully and gently pull
out the daughter board from the latching
connectors, using both hands, gripping
the board near the latch-up connectors as
shown in Fig. 3.5.3b . If the now empty
slot is to remain unused, be sure to install
a 6KPM-BLNK face plate cover.
Figure 3.5.3b: Removing a 6KPM
Card
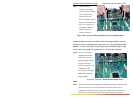
If another 6KPM card is replacing the one
that has been removed, follow the steps as described for installing a 6KPM card
discussed in Section 3.5.1.
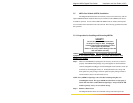
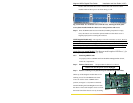
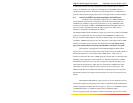
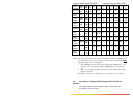
3.6 Connecting the Console Terminal to Magnum 6K25e
(Management)
Use a DB-9 “null modem” cable to connect the Magnum6K25e Console Port
(the RS-232 port on the 6K25e Switch) to the your PC, so that your PC
becomes the 6K25e’s Console Terminal.
Note: The DB-9 cable does not include with the 6K25e unit
package.
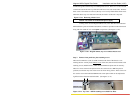
Rear View of Magnum 6K25e, (Typical Console Port is on the Rear of Reverse
6K25e Models)
Note: For detail description of Managed Network Software (MNS-6K) and Magnum
6K25e Switch configuration for Network Management, please refer to Magnum 6K25e
Software Manual available on GarrettCom‘s FTP site. Detail info. about the MNS is
available on 2.2.9 ( see page no. 13) of this manual.
Console
(
DB-9
)
Por
t
O
OF
CONSOLE
PORT