


CHAPTER 4: Installing Components
46
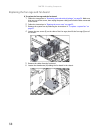
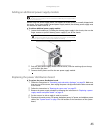
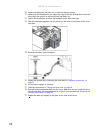
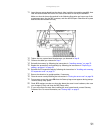
10 Remove the backplane and place it in a static-free bag for storage.
11 Holding the new backplane by the edges only, align it with the locking tabs on the hard
drive cage, then place it on the locking tabs and slide it up.
12 Tighten the thumbscrew to secure the backplane to the hard drive cage.
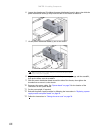
13 Slide the hard drive cage back into the opening in the front of the chassis until it clicks
into place.
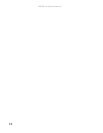
14 Reconnect all cables to the backplane.
15 Replace the system fans by following the instructions in “Replacing system fans” on
page 37.
16 Set the chassis upright, if necessary.
17 Follow the instructions in “Closing the server case” on page 26.
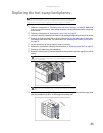
18 Reinstall the hot-swap drives back into the server. Make sure that you install the drives
into the same bays you removed them from in Step 4. For instructions see “Removing and
installing a hard drive” on page 28.
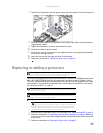
19 Replace the bezel by snapping it into place on the front of the server.
Connect to Mezzanine Board