18
I
OPERATING INSTRUCTIONS
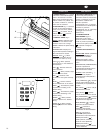
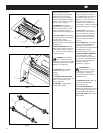
1. Turn the laminator on (I) at the
main power switch located at
the back of the machine (Figure
10).
2. CAUTION: Make sure the
safety shield and feed
tray are in their proper
positions.
3. The laminator will automatically
default to the COLD setting
which is used for PSA
(pressure sensitive adhesive)
film. For thermal film press HOT,
when pressed, automatically
sets the temperature to 230 ºF
(110 ºC)The laminator will
automatically set the speed
and temperature for the
respective NAP II film and 20
lb. bond paper (copier
paper). If you are using NAP I
film the heat and speed settings
will be different. Refer to the
Catena Series Lamination Guide
chart in section LAMINATION
GUIDE AND THE ART OF
LAMINATING for these settings.
The settings in the guide are
suggested starting points and
will vary with different types of
items to be laminated.
4. Do not begin laminating until
the READY LED illuminates.
The normal warm-up time is
approx-imately 10 minutes.
5. Position the roller gap handle to
correspond to the gauge of film
laminated.
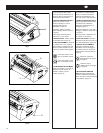
6. Position the item(s) to be
laminated on the Feed Table.
7. Press RUN. The rollers will begin
to turn. Wait for the heat line to
disappear, then push the item(s)
into the nip point of the heat
rollers. Additional items can be
laminated without stopping and
starting the laminator.
8. Should a jam occur (wrap-up),
press STOP. Refer to the
section CLEARING A FILM JAM
for specific instructions.
9. Stop the laminator when all of
the items have completely exited
the rear of the machine.
10.Allow the laminator to remain
powered if it is anticipated that it
will be used within a short
period of time.
ISTRUZIONI PER L’USO
1.
Agendo sull’interruttore generale
posto sulla parte posteriore della
macchina, fornire tensione alla
plastificatrice (Figura 10).
2.ATTENZIONE:
Assicurarsi
che lo schermo protettivo ed il
piano di alimentazione siano
posizionati correttamente.
3.
La plastificatrice si stabilirà
automaticamente sui valori standard
per l’impostazione di
COLD
(FREDDO)
utilizzata per film
autoadesivo (PSA). Per film termico,
quando premuto, imposta
automaticamente la temperatura
a 110 ºC (230 ºF)
.
La
plastificatrice imposterà
automaticamente la velocità
e la temperatura per il
rispettivo film e per carta da
scrivere da 20 lb. (carta per
fotocopiatrici)
. Se si utilizza film
NAP I le impostazioni di calore e
velocità saranno differenti. Per tali
impostazioni, far riferimento al grafico
della guida alla plastificazione della
serie Catena nel capitolo GUIDA
ALLA PLASTIFICAZIONE E
L’ARTE DELLA
PLASTIFICAZIONE
Le impostazioni riportate nella guida
sono punti di partenza consigliati e
varieranno a seconda del tipo di
materiale da plastificare.
4. Non avviare la plastificazione
finché il pannello a cristalli
liquidi READY (PRONTO) non
si illumina.
Il normale tempo di
riscaldamento è di circa 10 minuti.
5.
Regolare la manopola di apertura del
rullo in modo che corrisponda alla
misura del film da plastificare.
6.
Posizionare l’articolo/i da plastificare
sul piano di alimentazione.
7.
Premere il pulsante
RUN (AVVIO)
. I
rulli inizieranno a girare. Attendere
che la linea del calore sparisca e
spingere l’articolo/i nel punto di presa
dei rulli di riscaldamento. E’ possibile
plastificare altri articoli senza
arrestare e riavviare la macchina.
8.
In caso di inceppamenti
(riavvolgimenti), premere il pulsante
STOP (ARRESTO)
. Far riferimento
al capitolo
RIPRISTINO FILM
INCEPPATO
per istruzioni
dettagliate.
9.
Fermare la plastificatrice una volta
che tutti gli articoli laminati siano
usciti completamente dal retro della
macchina.
10.
Lasciare la plastificatrice accesa se
si prevede di utilizzarla in un breve
arco di tempo.
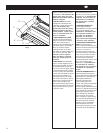
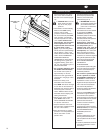
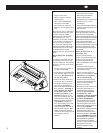
Main ON/ OFF
Switch
Fig. 10


