


26
I
14. Slide the feed tray under the
draped bottom roll of film.
Reinstall the feed table so that
the bottom roll of film is resting
on the tray.
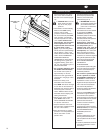
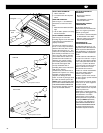
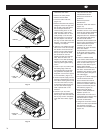
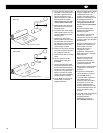
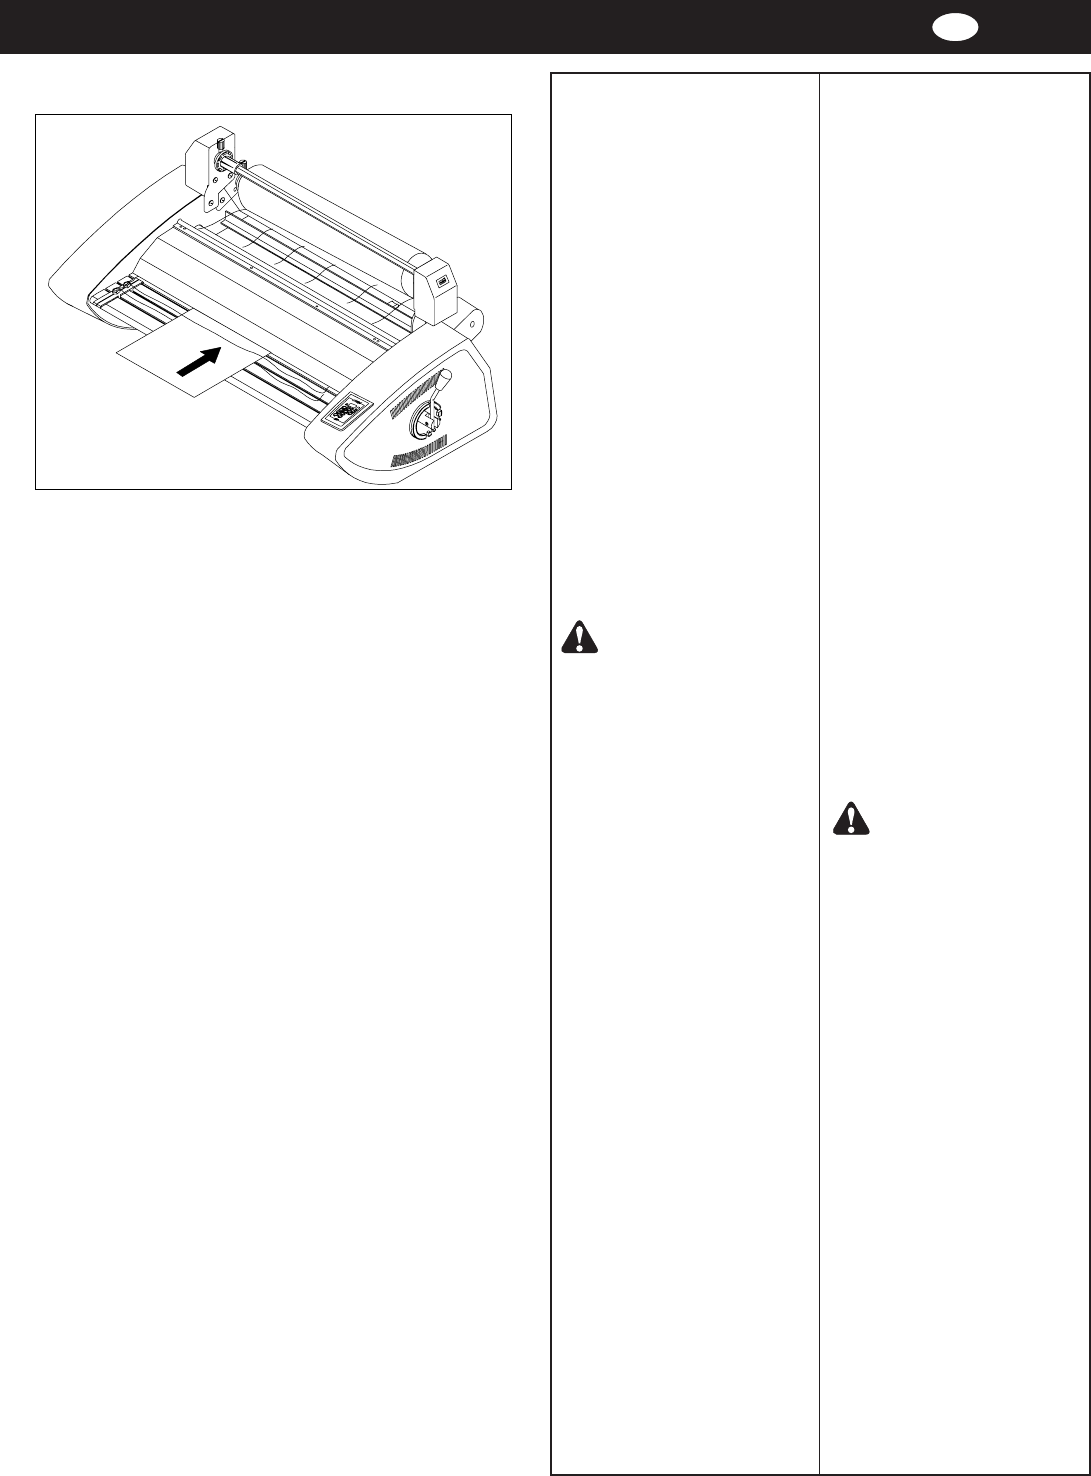
15. Slide the threading card
between the feed tray and the
film web lying on the tray, and
gently push into the nip area of
the heat rollers (Figure 16).
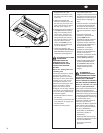
16. Replace the safety shield then
push RUN. Watch the leading
edge of the threading card to
ensure that it enters the nip
area of the heat rollers and is
being pulled into the laminator.
The card will guide the web of
both film rolls into the heat
rollers. Push STOP once the
threading card has exited the
rear of the laminator.
17. Check film alignment. See
section entitled FILM ALIGNMENT
PROCEDURE for instructions if
installed film needs alignment.
CAUTION THE FOLLOWING
PROCEDURE IS
PERFORMED WHILE THE
LAMINATOR IS HOT. USE
EXTREME CAUTION. AVOID
CONTACT WITH THE HEAT
ROLLERS.
Method For Tacking New Film
to Existing Film
The following describes a method
for loading film whereby the
existing film present on the heat
rollers may be used in place of the
threading card to draw the new
film through the laminator. The
adhesive of the existing film must
be tacky or liquefied. Leading
edges of the new film will be
overlapped onto the tacky adhesive
of the old film. The existing film and
the new film will be pulled through
the laminator together.
1. Preheat the laminator. Remove
the feed tray.
2. Cut remaining top and bottom film
webs between the supply rolls
and heat rollers.
3. Remove the safety shield.
14. Inserire il piano di alimentazione
sotto il pezzo di film che è
adagiato al di sopra della bobina di
film inferiore. Rimontare il piano di
alimentazione in modo tale che la
bobina inferiore si appoggi sul
piano.
15. Infilare il cartoncino di inserimento
tra il piano di alimentazione ed il
film posato sul piano. Spingere
delicatamente nella zona di presa
dei rulli di riscaldamento. (Figura
16).
16. Rimontare lo schermo di
protezione e quindi premere il
pulsante RUN (AVVIO).
Controllare il bordo di entrata del
cartoncino di inserimento per
assicurarsi che entri nell’area di
presa dei rulli di riscaldamento e
sia tirato all’interno della
plastificatrice. Il cartoncino
guiderà il film di entrambe le
bobine tra i rulli di riscaldamento.
Quando il cartoncino di
inserimento è fuoriuscito dal retro
della plastificatrice, premere il
pulsante STOP (ARRESTO).
17. Verificare l’allineamento del film.
Vedere il capitolo METODO DI
ALLINEAMENTO DEL FILM per
maggiori istruzioni se il film
montato richiede di essere
allineato.
ATTENZIONE: LA
SEGUENTE PROCEDURA
DEVE ESSERE ESEGUITA QUANDO
LA PLASTIFICATRICE E’ CALDA.
OPERARE CON LA MASSIMA
CAUTELA. EVITARE IL CONTATTO
CON I RULLI DI RISCALDAMENTO.
Metodo per attaccare una nuova
bobina a quella preesistente
Quanto segue è la descrizione di un
metodo per il caricamento di film
utilizzando film già presente sui rulli di
riscaldamento al posto del cartoncino
di inserimento per alimentare il nuovo
film nella plastificatrice. L’adesivo del
film presente deve essere
appiccicoso o liquefatto. Il bordo di
entrata del nuovo film verrà
sovrapposto all’adesivo appiccicoso
del film anteriore. Il film presente e
quello nuovo verranno tirati insieme
attraverso la plastificatrice.
1. Preriscaldare la plastificatrice.
Rimuovere il cassetto di
alimentazione.
2. Tagliare gli strati di film superiore
ed inferiore rimanenti tra le bobine
ed i rulli di riscaldamento.
3. Rimuovere lo schermo di
protezione.
Threading card
Fig. 16