System Administrator Screens
30 309504E
1. Your Company Name – this is the end user’s com-
pany name.
2. “From” E-Mail Address – recipients of any e-mail
sent by Matrix will appear to come from the address
entered here. Typically, this is the e-mail address of
the person responsible for managing the bulk oil
tank deliveries and pick-ups at the Matrix site.
3. SMTP Server Address for Outgoing Mail – the
address of the mail server to which Matrix transfers
outbound e-mail. This address can be obtained from
either the Internet service provider or from IT per-
sonnel at the site. Some Internet service providers
change the SMTP address frequently (eg. AOL).
The Matrix e-mail functionality will not work with
these Internet service providers.
4. Use Authentication/User Name/Password – some
mail servers require authentication in the form of a
user name and password. If this is the case, check
the check box and enter the appropriate user name
and password here. Otherwise, leave the check box
unchecked and the user name and password fields
blank.
5. Click Apply close the screen and save changes.
To verify the e-mail configuration settings made above,
create a Current Tank Volume e-mail event (as
described below) for about 5 minutes in the future, allow
the time to expire, and verify with the recipient that the
e-mail was received. Once Matrix has created the e-mail
and transferred it to the mail server, Matrix cannot con-
firm that the e-mail actually arrived at the intended recip-
ient. However, Matrix Reporter provides a report that
summarizes e-mail events, at least as far as creating the
e-mail and getting it as far as the mail server.
Adding an E-Mail Event
Click Add E-Mail. A new record is added to the screen.
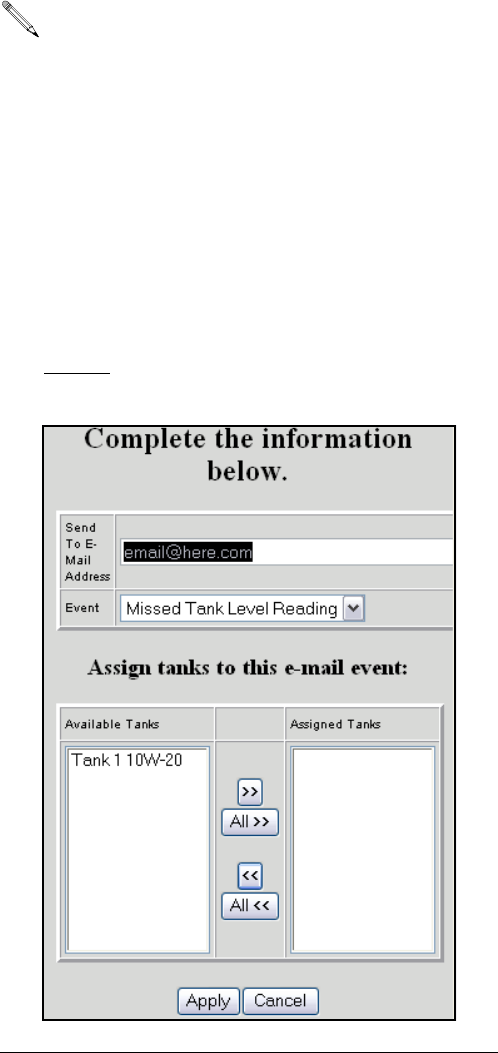
Modifying E-mail Events
1. Locate the e-mail event you wish to change and
select Modify.
2. In the new Send to E-mail Address, enter the e-mail
address of the person you wish to send notify of this
event.
3. Click the Event drop down list and select event.
4. Assign Tanks to this e-mail Event: Click and high-
light the tank(s) that you wish to send, then click the
(>>) right arrows. The tank(s) will be moved to the
assigned tank column. Click Apply. See F
IG. 57.
Removing an E-Mail Event
In the Action column of the record you want to change,
click remove
. The record is removed from the screen.
System Status ____________________________________________
Selecting the system status box returns the user to the Operator User System screen.
Only one address can be entered; if the same noti-
fication needs to be sent to multiple addresses, a
separate e-mail event must be created for each
recipient.
F
IG. 57 Modifying E-mail


