


5 XC Software Installation
For more details on the following steps, see the HP XC System Software Installation Guide, Section
2.3.2.
NOTE: The XC Software installation process may take as long as two hours to complete.
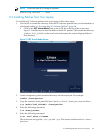
5.1 Booting the DVD
1. Start the installation, leaving the browser on the laptop connected to the OA.
NOTE: This document assumes that the internal DVD drive will be used. However, the
boot process can be much faster if you use an external drive attached to the head node with
a dongle.
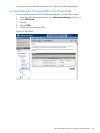
2. Open the Integrated Remote Console (IRC) to Bay 1 (head node). (Figure 4-1 (page 25))
3. Turn off the power to the head node.
4. Turn on the power to the head node.
5. The Boot prompt response you enter is server type dependent.
For HP Proliant BL460c:
Boot: linux ks=hd:scd0/ks.cfg
For HP Proliant BL465c:
Boot: linux ks=hd:scd0/ks.cfg pci=nommconf
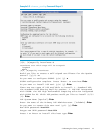
6. Select first disk, a global file system, and no RAID. You must choose your own time zone.
For example:
Select the disk for the installation: 1
Do you want to create the XC global file system?: Y
Would you like XC to use the default partition table?: d
Enter "C" to continue C
Time Zone:timezone
Root Password:Test1234
7. After the head node reboots, log in as root.
8. Open a terminal window.
Right-click and choose Terminal.
Or
Click Applications→System Tools→Terminal to open a terminal window.
5.1 Booting the DVD 27