


● An item loaded in the ADF jams repeatedly
● Clear jams from the ADF
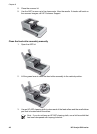
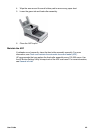
● Replace the feed-roller assembly
Paper jamming, skewing, misfeeds, or multiple-page feeds
● If the pages look skewed as they feed into the automatic document feeder, check
the resulting scanned images in the software to ensure that they are not skewed.
● The pages might not be placed correctly. Straighten the pages and adjust the paper
guides to center the stack.
● The ADF input tray or output tray might contain more than the maximum number of
pages. Load fewer pages in the input tray, and remove pages from the output tray.
● Clean the ADF to help reduce misfeeds. See Clean and maintain the automatic
document feeder (ADF) for information about cleaning the ADF. You can also find
cleaning information on the Web. See www.hp.com and search for “cleaning and
maintaining the ADF,” and “cleaning cloth.”
If that does not help, install the ADF Roller Replacement kit. The ADF Roller
Replacement kit contains a roller mechanism, a separation pad, and new screws to
replace the separation pad. For more information, see Replace the feed-roller
assembly.
● Remove any objects that are on the ADF lid.
● Check to see that the ADF lid is fully closed.
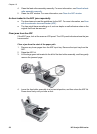
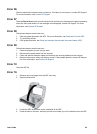
Paper does not feed from the ADF
● The ADF lid might not be securely latched. Open the ADF lid and then close it by
pressing firmly.
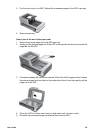
● A problem with the ADF hardware might exist. Use the following procedure to test
the ADF:
– Disconnect the USB cable and the power cable from the scanner. Check that
the power cable is still connected to the power source.
– Ensure that the accessory cable is connected to the scanner accessory port,
and that the ADF has at least two pieces of paper in the input tray.
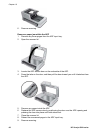
– Reconnect the power cable to the scanner, and then turn the scanner on.
– Try to scan another page through the ADF.
If the ADF does not feed paper, contact HP Customer Support.
The bottom of the scanned image is cut off
The ADF can handle media that is up to 355.6 mm (14.0 inches) long. If an item is longer,
use the scanner glass to scan it in sections.
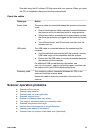
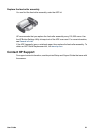
The scanned images have streaks or scratches
After each step, try another scan to see if the streaks or scratches are still apparent. If
so, then try the next step.
1. Check that the originals are clean and unwrinkled.
2. Clean the scanner glass. For more information, see Clean the scanner glass.
3. Use a cleaning cloth in the ADF. For more information, see Use the cleaning cloth
in the ADF.
User Guide 57