8
Installation
2.3 Installing the second projector (Set B)
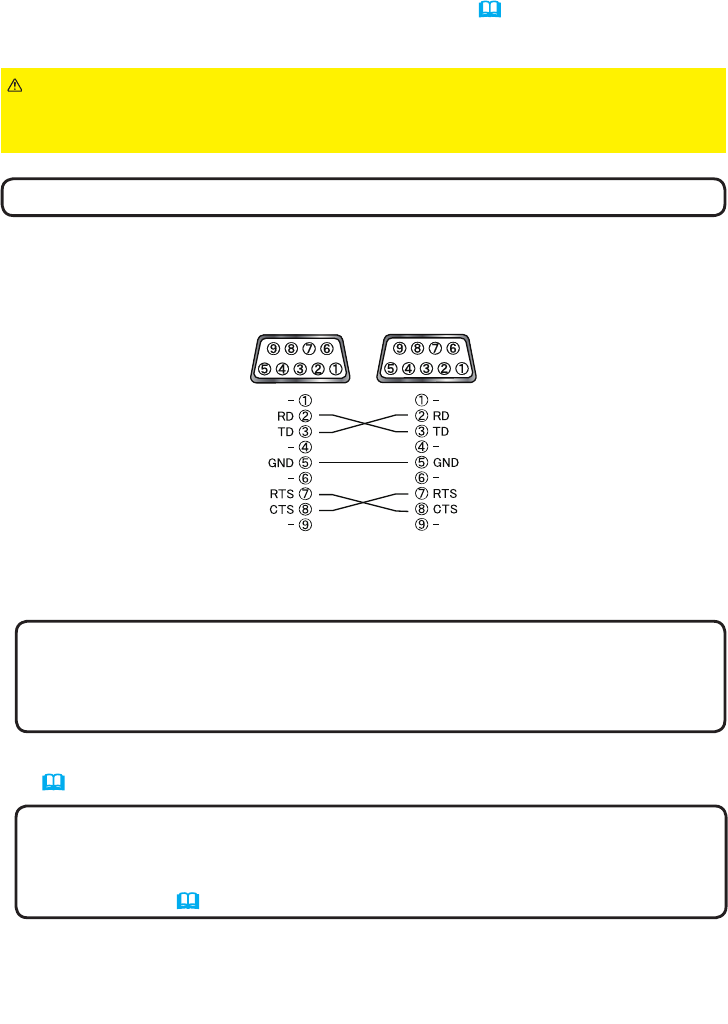
Connecting projectors
To use Intellectual Stack, connect an RS-232C cross cable between the
CONTROL port of Set A and Set B.
(continued on next page)
NOTE • KEYSTONE cannot be operated when PERFECT FIT is in use. To
reset both functions, reset PERFECT FIT rst.
• Perform the INSTALLATION setting rst if necessary as it may change the
image position. (
Operating Guide → SETUP menu)
2. Reset the adjustment of KEYSTONE and PERFECT FIT on Set B.
(Operating Guide → EASY MENU or SETUP menu)
1. Turn on Set B.
NOTE • After turning on Set B, make sure the image of Set B is not
signicantly tilted compared to the image of Set A. If the image is overly
tilted, rotate the elevator feet of Set B to adjust the angle such that the tilt is
just about right.
Setting up Set B
NOTE • Set the tilt angle of Set B to within 9 degrees from the level line.
Deciding installation position
Decide the position of Set B and its projection angle. (User’s Manual (concise)
→ Arrangement and Adjusting the projector’s elevator)
WARNING ►
Only for CP-X8160, CP-WX8255 and CP-WU8450, it is possible
to install the projector for any direction with specied mounting accessories.
Consult with your dealer about such a special installation.


