14 - 6
Powering the Dolphin Terminal
When seated in a base that is connected to the appropriate power source, the Dolphin terminal receives
the power to charge its main battery and run its internal circuitry. Keep the base plugged into the power
source so that the Dolphin terminal battery pack stays fully charged.
Note: Honeywell recommends that you leave the base connected to its power source at all times.
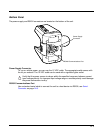
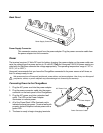
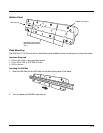
The base is powered via the power connector on the bottom panel; see Bottom Panel on page 14-3.
Both the power and serial connectors are straight out, not at an angle. The base requires a 12 VDC
power input.
Charging the Dolphin Terminal
The base supplies charging power to the Dolphin terminal so that the terminal can monitor the charging
of its battery pack. This charging method protects the battery from being damaged by overcharging.
Therefore, the Dolphin terminal may be stored indefinitely in the base without damage to the terminal,
the battery pack, or the base.
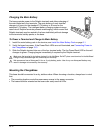
1. Insert a battery pack into the terminal.
2. Slide the terminal, imager window up and the LCD visible, into the terminal well until it stops.
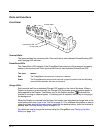
3. When the terminal is properly seated, the DOCK LED on the base illuminates solid green. The
terminal begins charging automatically.
Establishing Communication
The RS232 interface allows the terminal to communicate to a workstation, modem, any standard RS232
device using a standard RS232 and communications software.
Requirements
You need the following equipment:
• A Mobile Base device powered by a power adapter cable
• For RS232 communications, a serial cable
• ActiveSync v4.5 or above or Windows Mobile Device Center on the host workstation
• Windows 98 Second Edition, Windows Me, Windows 2000, Windows NT (4.0 SP6 or higher), Windows
XP, Windows Vista or Windows 7 on the host workstation.
Connecting the Communication Cables
Note: You must be using ActiveSync (4.5 or higher) or Windows Mobile Device Center.
1. Plug in the power supply and connect it to the bottom of the base.
2. Plug the RS232 communication cable into the appropriate connector on base.
3. Connect the other end of the communication cable into the back of the workstation.
4. At this point, the hardware is installed and operating.
You may need to reboot your workstation to complete the installation process.


