


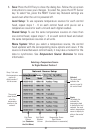
4. Select: Press the ENTER/INFO key or the RIGHT Cursor key. The check
mark indicates that the source is being used by the control head.
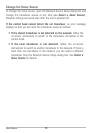
5. Save: Press the EXIT key to close the dialog box. Follow the on-screen
instructions to save your changes. To select No, press the LEFT Cursor
key. To select Yes, press the RIGHT Cursor key. Network settings are
saved even after the unit is powered off.
Local Setup (default): To use separate transducers for each control
head, repeat steps 1 - 5 on each control head until you’ve set a
transducer for each unit.
Shared Setup: To use the same transducer with more than one control
head, repeat steps 1 - 5 on each control head and select the same
transducer for all units.
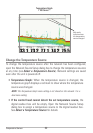
Menu System and Views: When you select a sonar source, the
control head updates with the corresponding menu options and views.
If the transducer is shared between control heads, it may take a
moment for the data to synchronize. See Sonar Source Overview for
more information.
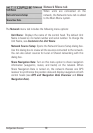
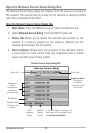
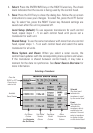
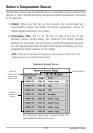
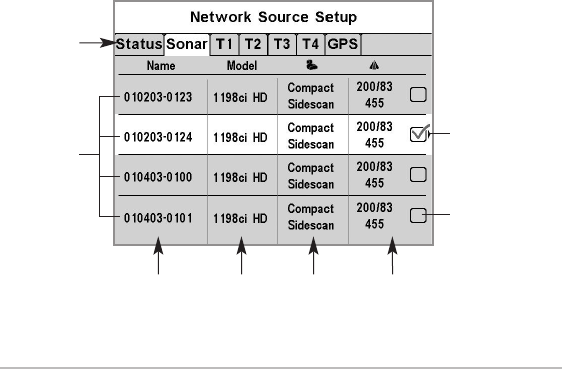
Selecting a Transducer
Available
Sonar Sources
Press the
RIGHT or LEFT
Cursor key to
select a tab.
Selected
The check mark
indicates the
transducer is used
by the control head.
Unit Model
Number
Column
Transducer
Model
Column
Beam
Frequencies
Column
Unit Name
Column
(see Customize
the Unit Name)
Empty
The empty box
indicates the
transducer data is
available but not
selected. You must
select a transducer
to display its data
on the control head.
15
Sonar Sources