


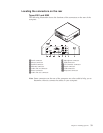
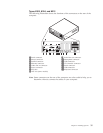

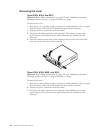
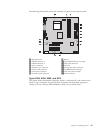
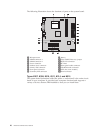

Connector
Description
Serial
connector
Used
to
attach
an
external
modem,
serial
printer,
or
other
devices
that
use
a
9-pin
serial
connector.
Mouse
connector
Used
to
attach
a
mouse,
trackball,
or
other
pointing
device
that
uses
a
standard
mouse
connector.
Keyboard
connector
Used
to
attach
a
keyboard
that
uses
a
standard
keyboard
connector.
USB
connectors
Used
to
attach
a
device
that
requires
a
Universal
Serial
Bus
(USB)
connection,
such
as
a
USB
scanner
or
USB
printer.
If
you
have
more
than
four
USB
devices,
you
can
purchase
a
USB
hub,
which
you
can
use
to
connect
additional
USB
devices.
Parallel
connector
Used
to
attach
a
parallel
printer,
parallel
scanner,
or
other
devices
that
use
a
25-pin
parallel
connector.
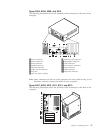
Ethernet
connector
Used
to
attach
an
Ethernet
cable
for
a
local
area
network
(LAN).
Note:
To
operate
the
computer
within
FCC
Class
B
limits,
use
a
Category
5
Ethernet
cable.
Microphone
connector
Used
to
attach
a
microphone
to
your
computer
when
you
want
to
record
voice
or
other
sounds
on
the
hard
disk
if
you
use
speech-recognition
software.
Audio
line
out
connector
Used
to
send
audio
signals
from
the
computer
to
external
devices,
such
as
powered
stereo
speakers
(speakers
with
built-in
amplifiers),
headphones,
multimedia
keyboards,
or
the
audio
line
in
connector
on
a
stereo
system
or
other
external
recording
device.
Audio
line
in
connector
Used
to
receive
audio
signals
from
an
external
audio
device,
such
as
a
stereo
system.
When
you
attach
an
external
audio
device,
a
cable
is
connected
between
the
audio
line
out
connector
of
the
device
and
the
audio
line
in
connector
of
the
computer.
Obtaining
device
drivers
Device
drivers
can
be
obtained
for
operating
systems
that
are
not
preinstalled
at
http://www.ibm.com/pc/support/
on
the
World
Wide
Web.
Installation
instructions
are
provided
in
README
files
with
the
device
driver
files.
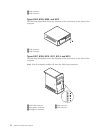
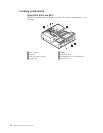
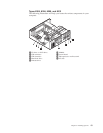
Installing
internal
options
The
capabilities
of
the
computer
can
be
expanded
by
adding
memory,
drives,
or
adapters.
When
installing
an
option,
use
these
instructions
along
with
the
instructions
that
come
with
the
option.
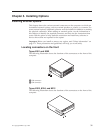
Chapter
5.
Installing
Options
39