


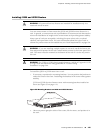
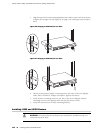
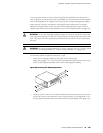
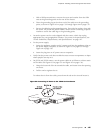


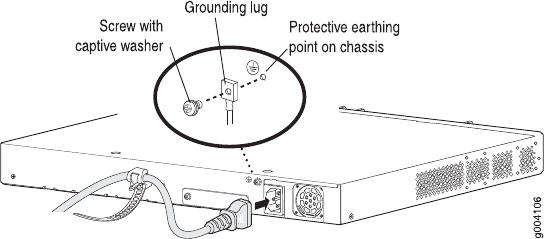
c. With a Phillips screwdriver, remove the screw and washer from the PEM
nuts at the grounding point on the rear of the chassis.
d. Place the grounding lug at the other end of the cable over the grounding
point, as shown in Figure 62 on page 125 through Figure 64 on page 126.
e. Secure the cable lug to the grounding point, first with the washer, then with
the screw. On J2320 and J2350 routers, use the screw containing a captive
washer to secure the cable lug to the grounding point.
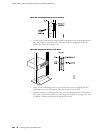
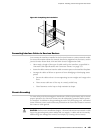
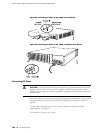
3. Locate the power cord or cords shipped with the router, which has a plug
appropriate for your geographical location. For power cord specifications, see
“Power Guidelines, Requirements, and Specifications” on page 107.
4. For the power supply:
a. Insert the appliance coupler end of a power cord into the appliance inlet on
the power supply faceplate, as shown in Figure 62 on page 125 through
Figure 64 on page 126.
b. Insert the plug into an AC power source receptacle.
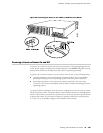
5. Verify that the power cord does not block access to router components or drape
where people can trip on it.
6. On J2320 and J2350 routers, use the power cable tie as follows to relieve strain
on the cable (see Figure 62 on page 125 and Figure 63 on page 126):
a. Wrap the loose end of the tie around the cable, and insert it into the opening
on the tie.
b. Pull the end to tighten the tie.
To release the tie from the cable, press down the tab on the tie and loosen it.
Figure 62: Connecting AC Power to the J2320 Services Router
Connecting Power ■ 125
Chapter 6: Installing and Connecting a Services Router