


12 EN
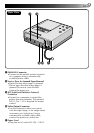
CONNECTIONS
REMOTE PAUSE
S
INPUT
VIDEO
VIDEO OUTPUT
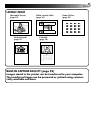
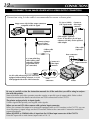
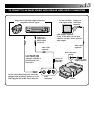
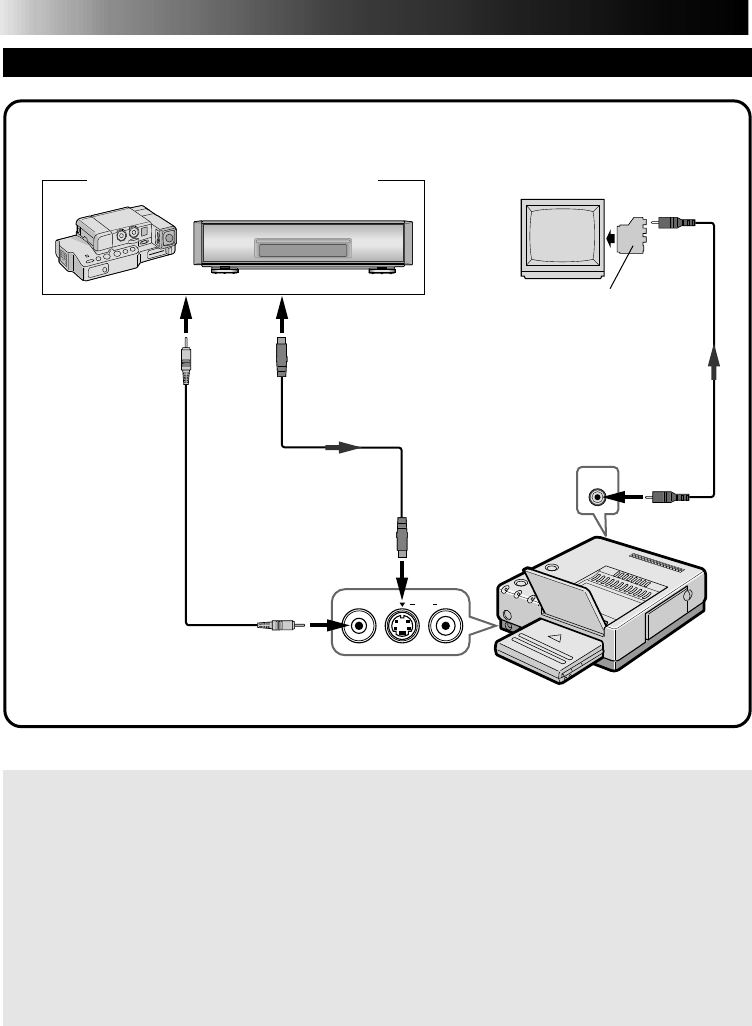
TO CONNECT TO AN IMAGE SOURCE WITH S-VIDEO OUTPUT CONNECTORS
Connection using S-video cable is recommended to ensure a clearer print.
Be sure to carefully review the instruction manuals for all the units that you will be using in conjunc-
tion with this printer.
Some televisions and video cassette recorders require a specific type of output cable. Refer to their
instruction manuals for details on television and VCR connections to the GV-PT2.
The printer assigns priority to input signals.
S-video signals take priority over regular video signals.
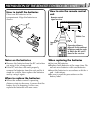
When you use an LCD video camera with a printer input connector:
When you connect the output of a camcorder equipped with an LCD monitor to the GV-PT2, you can
view the printer’s output image on the LCD monitor. Refer to the camcorder’s instruction manual for
connection details.
When SQUEEZE or CINEMA video is input into the S-Video input connector of the GV-PT2:
Print this input with a wide format (aspect ratio of 16 : 9)
Connect to S-
Video input
connector
Connect to video
output connector
Rear connectors
Connect to image
source S-Video
output connector
S-Video cable
(optional)
ø 3.5 mm Mini-Plug
cable (editing cable
optionally available
or provided with a
JVC camcorder)
Use this cable when using a JVC camcorder
equipped with an Editing connector, or a JVC
VCR equipped with an R.A. EDIT connector.
Front
connectors
Video cable
(optional)
Printer
Image source with S-Video output connectors
compatible with PAL signals
TV (set to VIDEO
(EXT. input) mode)
Cable adapter (optional)
If your TV has the 21 pin AV input
connector (SCART), use the optional
cable adapter
Connect to
video input
connector