Dual In-Line Memory Module (DIMM)
129
2
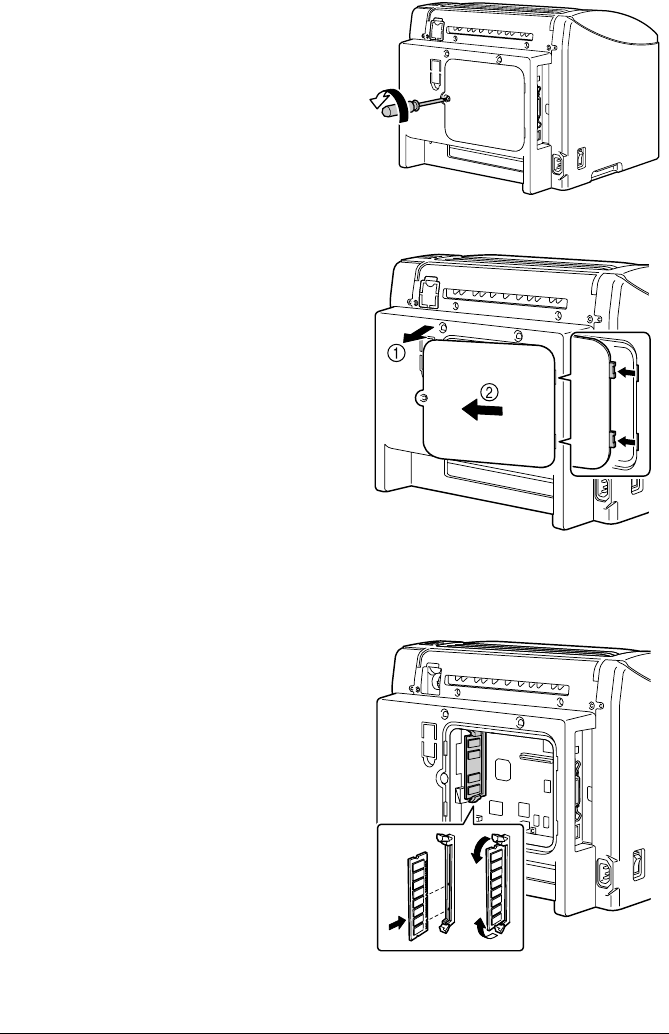
Using a screwdriver, remove the
screw on the back of the printer.
3
Remove the rear panel.
!"
Since there are two
hooks on the right side of
the panel, remove the
rear panel by slightly pull-
ing the left side of the
panel toward you, then
sliding the panel off to the
left.
4
Insert the new DIMM straight
into the DIMM connector until
the latches snap into the locked
position.
Observe the keyed side of the
DIMM to align it with the connec-
tor. If you cannot snap the DIMM
into place, do not force it. Repo-
sition it, making sure that the
DIMM is seated completely in
the connector.


