ETS Installation Guide
46
9
9
:
:
D
D
L
L
C
C
C
C
o
o
n
n
f
f
i
i
g
g
u
u
r
r
a
a
t
t
i
i
o
o
n
n
f
f
o
o
r
r
L
L
A
A
N
N
M
M
a
a
n
n
a
a
g
g
e
e
r
r
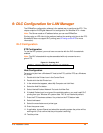
The EZWebCon configuration software is the easiest way to configure the ETS. This
chapter explains DLC/Digital Network Port configuration for Windows NT 4.x hosts.
Note: The Server needs an IP address before you can use EZWebCon.
Printing using an LPD client is the preferred method for sending print jobs to the ETS.
Windows 95 does not support DLC printing (see 5:Printing on the ETS for more
information).
DLC Configuration
ETS Configuration
To use the DLC protocol, you must have one service with the DLC characteristic
enabled.
Note: The DLC characteristic may be associated with only one service on a
given ETS.
Figure 9-1. Enabling DLC
Local>> DEFINE SERVICE ETS_xxxxxx DLC ENABLED
Host Configuration
To send print jobs from a Windows NT host to the ETS, add the ETS as a Windows
NT printer.
1. Double-click the Printers icon in the Control Panel.
2. Double-click the Add Printer icon.
3. In the window that appears, select My Computer and click Next.
4. Select the Add Port button.
5. Select Hewlett-Packard Network Port and click New Port.
6. If Hewlett-Packard port is not one of the available options, you must install DLC
printing from your Windows NT system disks. DLC is not installed by default.
7. Enter the ETS hardware address. It is printed on the ETS bottom label.
8. Select Job-based.
9. Select the manufacturer and printer type.
10. Enter the queue name.
11. If applicable, choose Shared and select the operating system the printer will be
working with. (First confirm that the print queue is working.)
12. Test the printer.


