5: Configuration Using Web-Manager
XPress DR+ User Guide 41
communication to the XPress DR+.
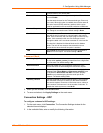
Terminal Name
This field is available for configuration only when Telnet Mode
is set to Enable.
Use the terminal name for the Telnet terminal type. Enter only
one name. When this option is enabled, the unit also reacts to
the end of record (EOR) and binary options, which can be
used for applications such as terminal emulation to IBM hosts.
Connect Response
A single character is transmitted to the serial port when there
is a change in connection state. Default setting is None.
Use Hostlist If this option is set to True, the device server scrolls through
the host list until it connects to a device listed in the host list
table. Once it connects, the unit stops trying to connect to any
others. If this connection fails, the unit continues to scroll
through the table until it connects to another IP in the host list.
The host list is disabled for Manual Mode and for Modem
Mode. The unit will not accept a data connection from a
remote device when the host list option is enabled.
LED Select Blink for the status LEDs to blink upon connection or
None for no LED output. The default setting is Blink.
Disconnect Mode
On Mdm_Ctrl_In Drop Set to Yes for the network connection to or from the serial port
to drop when modem_control_in transitions from a high state
to a low state. The default setting is No.
Hard Disconnect When set to Yes, the TCP connection closes even if the
remote site does not acknowledge the disconnect request.
With EOT Select Yes to drop the connection when Ctrl-D or Hex 04 is
detected. Both Telnet Mode and Disconnect with EOT must
be enabled for Disconnect with EOT to function properly.
Ctrl+D is only detected going from the serial port to the
network. The default setting is No.
Inactivity Timeout
Use this parameter to set an inactivity timeout. The unit drops
the connection if there is no activity on the serial line before
the set time expires. Enter time in the format mm:ss, where m
is the number of minutes and s is the number of seconds. To
disable the inactivity timeout, enter 00:00.
3. When you are finished, click the OK button.
4. To save and reboot, click Apply Settings on the main menu.
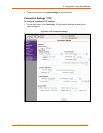
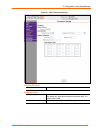
Connection Settings - UDP
To configure a channel’s UDP settings:
1. On the main menu, click Connection. The Connection Settings window for the
selected channel displays.
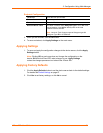
2. In the available fields, enter or modify the following information:


