


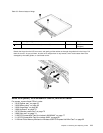
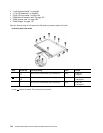
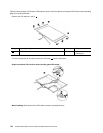
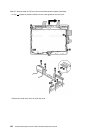
Table 35. Removal steps of LCD panel, LCD bracket L and R, and LCD cable for touch panel LCD model or direct-bonding
glass LCD model (continued)
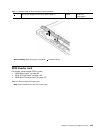
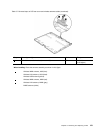
1
M2 × 3.5 mm, wafer-head, nylon-coated (5) Silver
0.181 Nm
(1.85 kgfcm)
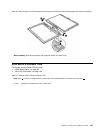
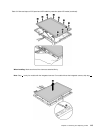
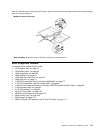
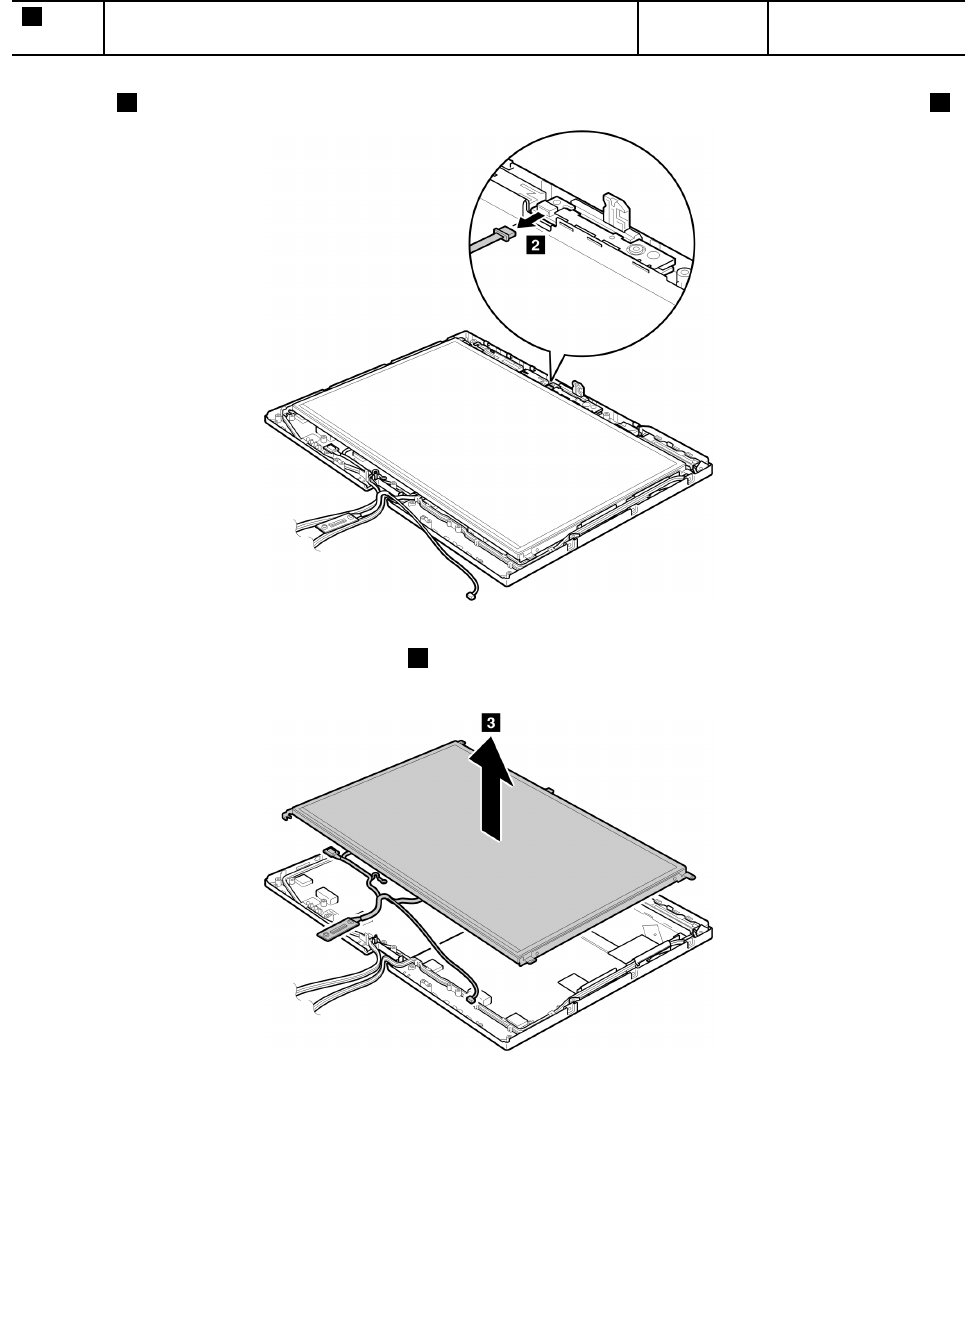
Note: Step 2 is only for models with the integrated camera. For models without the integrated camera, skip step 2 .
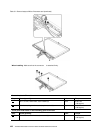
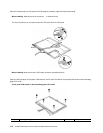
When installing: Make sure that the connector 2 is attached rmly.
Chapter 8. Removing and replacing a FRU 115