2. When the ThinkPad logo comes up, immediately press F1 to enter the BIOS Setup Utility (ThinkPad
Setup for ThinkPad X120e).
Note: If a supervisor password has been set by the customer, BIOS Setup menu or UEFI BIOS Setup
menu appears after the password is entered. You can start the utility by pressing Enter instead of
entering the supervisor password; however, you cannot change the parameters that are protected
by the supervisor password.
3. On the BIOS Setup Utility (ThinkPad Setup for ThinkPad X120e) screen, press F9, Enter, F10, and
then press Enter.
Note: When you initialize the computer conguration, some devices are disabled, such as the serial
port. If you test one of these devices, you will need to enable it by using Conguration utility for DOS.
The utility is available on the following Web site:
http://www.lenovo.com/support
PC-Doctor cannot be used to test a device that is in the docking station, even if the computer supports the
docking station. To test a USB device, connect it to the USB connector of the computer.
Testing the computer
In this product, you need an external optical drive to use the PC-Doctor diagnostic CD to test the hardware
features.
Note: The PC-Doctor diagnostic CD does not support any external optical drives connected through USB
devices or any others.
To run the test, do as follows:
1. Turn off the computer.
2. Attach an external optical drive through the USB connector to the computer.
3. Set the external optical drive as a startup device.
4. Turn off the computer.
5. Turn on the computer. If the computer cannot be powered on, go to “Power system checkout” on
page 26
, and check the power sources.
If an error code appears, go to “Symptom-to-FRU index” on page 33.
6. When the ThinkPad logo comes up, immediately press F12 to enter the Boot Menu.
7. Insert the PC-Doctor CD into the external optical drive.
8. Press cursor keys to select ATAPI CDx (x: 0, 1, ...) and then press Enter.
9. Follow the instructions on the screen.
10. The main panel of PC-Doctor appears.
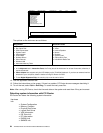
11. Select Diagnostics with the arrow keys, and press Enter.
Note: You can select an item not only with the arrow keys, but also with the TrackPoint® pointer.
Instead of pressing Enter, click the left button.
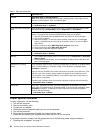
A pull-down menu appears. (Its exact form depends on the model.)
Note: PC-Doctor menu does not mean the formal support device list. Some unsupported device names
may appear in the PC-Doctor menu.
Chapter 3. General checkout 23


