Scan was not successful
If the "Before you troubleshoot" checklist does not solve the problem, then try one or more of the following:
CHECK THE USB CONNECTION
1 Check the USB cable for any obvious damage. If the cable is damaged, then use a new one.
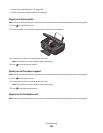
2 Firmly plug the square end of the USB cable into the back of the printer.
3 Firmly plug the rectangular end of the USB cable into the USB port of the computer.
The USB port is marked with
.
Note: If you continue to have problems, then try another USB port on the computer. You may have connected to a
defective port.
RESTART THE COMPUTER
ADD NETWORK PRINTERS THROUGH THE EDIT DEVICE LIST DIALOG
If you are scanning from a network printer, then add that printer using the Edit Device List dialog. For more
information, see the Edit Device List Help:
1 With the Scan Center application open, choose Browse Devices from the Device pop-up menu.
2 Click
?
from the Edit Device List dialog that appears.
MAKE SURE “ENABLE NETWORK SCAN TO COMPUTER” IS SELECTED IN THE GENERAL TAB OF THE SCAN
CENTER (MACINTOSH ONLY)
Notes:
• This is available only in Mac OS X version 10.6.
• If you have several applications open, then make sure that the Scan Center is the active application. Otherwise,
the correct menu bar does not appear.
From the menu bar, navigate to:
Scan Center > Preferences > General tab
Scanning takes too long or freezes the computer
If the "Before you troubleshoot" checklist does not solve the problem, then try one or more of the following:
CLOSE OTHER SOFTWARE PROGRAMS THAT ARE NOT BEING USED
USE A LOWER SCANNING RESOLUTION
Troubleshooting
106


