Using Macintosh
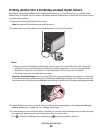
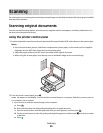
1 Open the top cover, and then load an original document facedown on the scanner glass.
2 Close the top cover to avoid dark edges on the scanned image.
3 From the Finder desktop, double-click the printer folder.
4 Double-click XXXX Series Center, where XXXX is the printer series.
5 From the “What is being scanned?” menu, choose the type of document to be scanned.
6 Click Scan.
Scanning color or black-and-white original
documents
1 Load an original document faceup into the Automatic Document Feeder (ADF) or facedown on the scanner glass.
Notes:
• Do not load postcards, photos, small items, transparencies, photo paper, or thin media (such as magazine
clippings) into the ADF. Place these items on the scanner glass.
• Adjust the paper guide on the ADF tray to the width of the original document.
• When using the scanner glass, close the top cover to avoid dark edges on the scanned image.
2 From the printer control panel, press .
3 Press the arrow buttons to choose where to send the scanned image. You can send the scanned image to a
computer, flash drive, memory card, or to a computer over a network.
4 When the destination that you want appears, press .
5 To scan black-and-white documents, press Black.
Note: The default setting when you are using the Scan mode is Color. You do not need to press Color if you are
scanning a color document.
6 Press .
Scanning photos for editing
1 Open the top cover, and then load an original document facedown on the scanner glass.
2 Close the top cover to avoid dark edges on the scanned image.
3 From the printer control panel, press .
4 Press the arrow buttons until Computer or Network appears, and then press .
Note: If you choose Network, you will be asked to select a network computer. If prompted, press the arrow
buttons until the network computer that you want appears, and then press
.
Scanning
95


