43
How to add a memory card
How to add a memory card
The system board has one connector for an optional memory card. The printer can support up to 64MB of additional
memory (for a total of 80MB) for the Lexmark E240 and up to 128MB (for a total of 160MB) for the Lexmark E240n.
CAUTION: If you are installing a memory card after setting up the printer, turn the printer off, and unplug the
power cord before continuing.
Note: Memory options designed for other Lexmark printers may not work with your printer.
1 Access the system board (see How to access the system board).
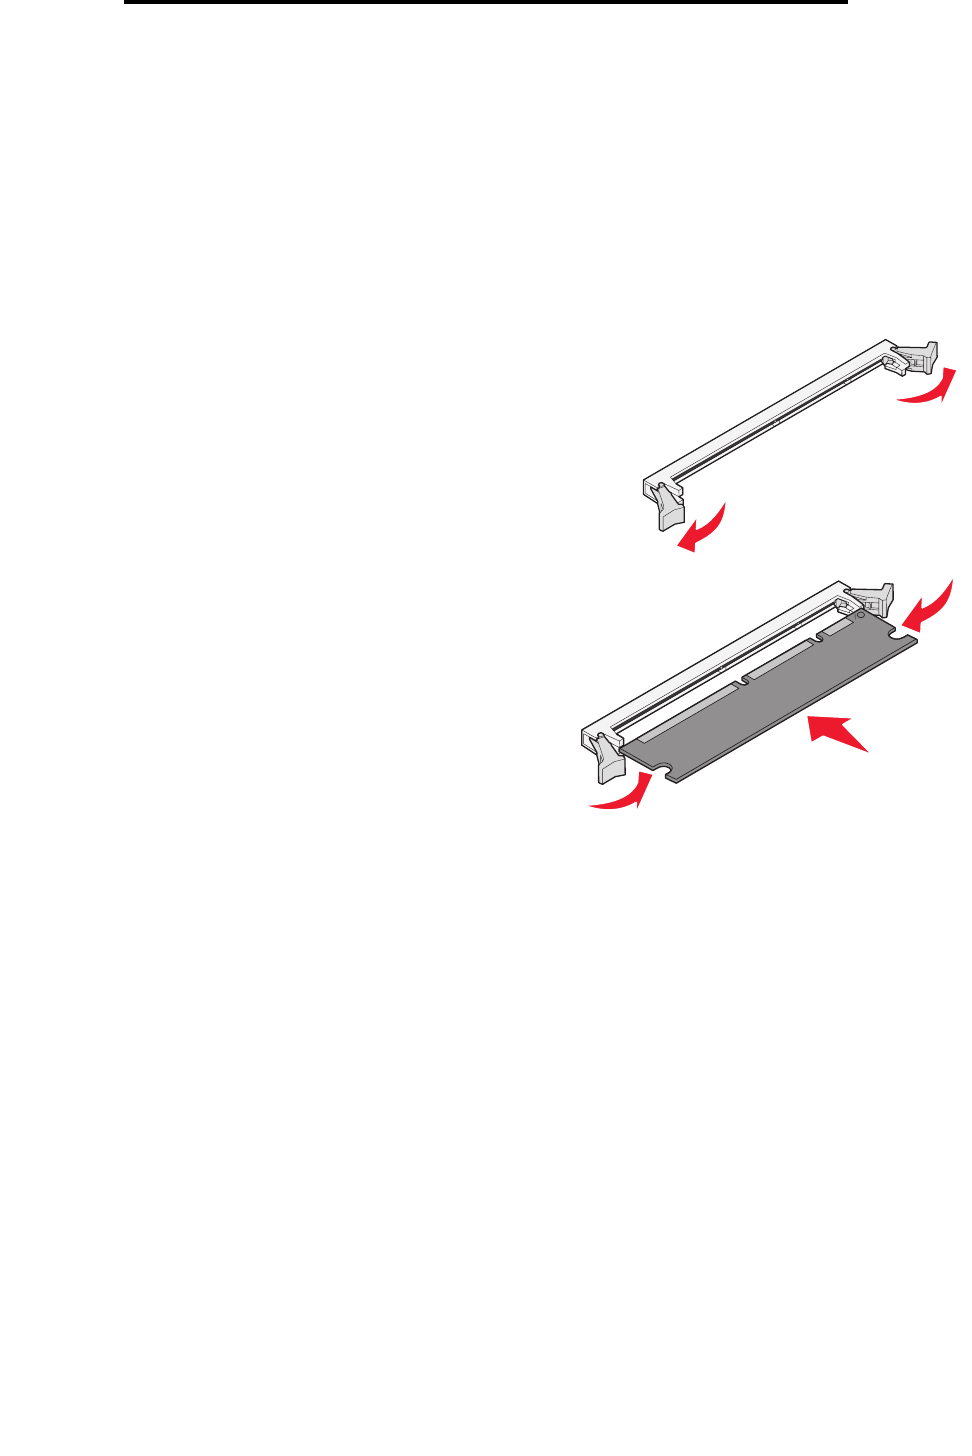
2 Push open the latches on both ends of the memory connector.
3 Unpack the memory card.
Warning: Memory is easily damaged by static electricity. Touch
something metal, such as the printer frame, before you
touch a memory card.
Avoid touching the connection points along the edge of the card.
4 Align the notches on the bottom of the card with the notches
on the connector.
5 Push the memory card firmly into the connector until the
latches on either end of the connector snap into place.
It may require some force to fully seat the card.
6 Make sure each latch fits over the notch on each end of the
card.
7 Close the side cover.
8 Close the rear exit.
9 Close the front cover.
10 See Recognizing installed options.
Recognizing installed options
After the printer is turned on, the printer driver should automatically recognize an option you installed. If it does not, you can
add it manually.
Note: If you have not installed your printer driver yet, follow the appropriate instructions under Software
tasks. After you have installed a printer driver, return here to complete these instructions.
1 Click Start Æ Settings Æ Printers.
2 Select the printers icon.
3 Click File Æ Properties.
4 Click the Install Options tab.
5 Add the appropriate options to your configuration:
• Memory Card—Increase the printer memory to the appropriate number.
6 Click OK.
