Chapter 3
Advanced Configuration
21
Wireless-N ADSL2+ Gateway
From the Advanced Settings screen you can adjust the
settings for specific VPN tunnels.
Phase 1 Phase 1 is used to create a security association
(SA), often called the IKE SA. After Phase 1 is completed,
Phase 2 is used to create one or more IPSec SAs, which are
then used to key IPSec sessions.
Operation Mode There are two modes: Main and
Aggressive, and they exchange the same IKE payloads
in different sequences. Main mode is more common;
however, some people prefer Aggressive mode because
it is faster. Main mode is for normal usage and includes
more authentication requirements than Aggressive mode.
Main mode is recommended because it is more secure. No
matter which mode is selected, the VPN Router will accept
both Main and Aggressive requests from the remote VPN
device. If a user on one side of the tunnel is using a Unique
Firewall Identifier, this should be entered under the User
Name field.
Encryption 3DES is used to encrypt/decrypt ESP
packets.
Authentication Select the method used to authenticate
ESP packets. There are two choices: MD5 and SHA. SHA is
recommended because it is more secure.
Group. There are two Diffie-Hellman Groups to choose
from: 768-bit, 1024-bit, and 1536-bit. Diffie-Hellman refers
to a cryptographic technique that uses public and private
keys for encryption and decryption.
Key Lifetime In the Key Lifetime field, you may optionally
select to have the key expire at the end of a time period of
your choosing. Enter the number of seconds you’d like the
key to be used until a re-key negotiation between each
endpoint is completed.
Phase 2
Group There are two Diffie-Hellman Groups to choose
from: 768-bit, 1024-bit., and 1536-bit Diffie-Hellman refers
to a cryptographic technique that uses public and private
keys for encryption and decryption.
Key Lifetime In the Key Lifetime field, you may optionally
select to have the key expire at the end of a time period of
your choosing. Enter the number of seconds you’d like the
key to be used until a re-key negotiation between each
endpoint is completed.
Click Save Settings to apply your changes, or click Cancel
Changes to cancel your changes.
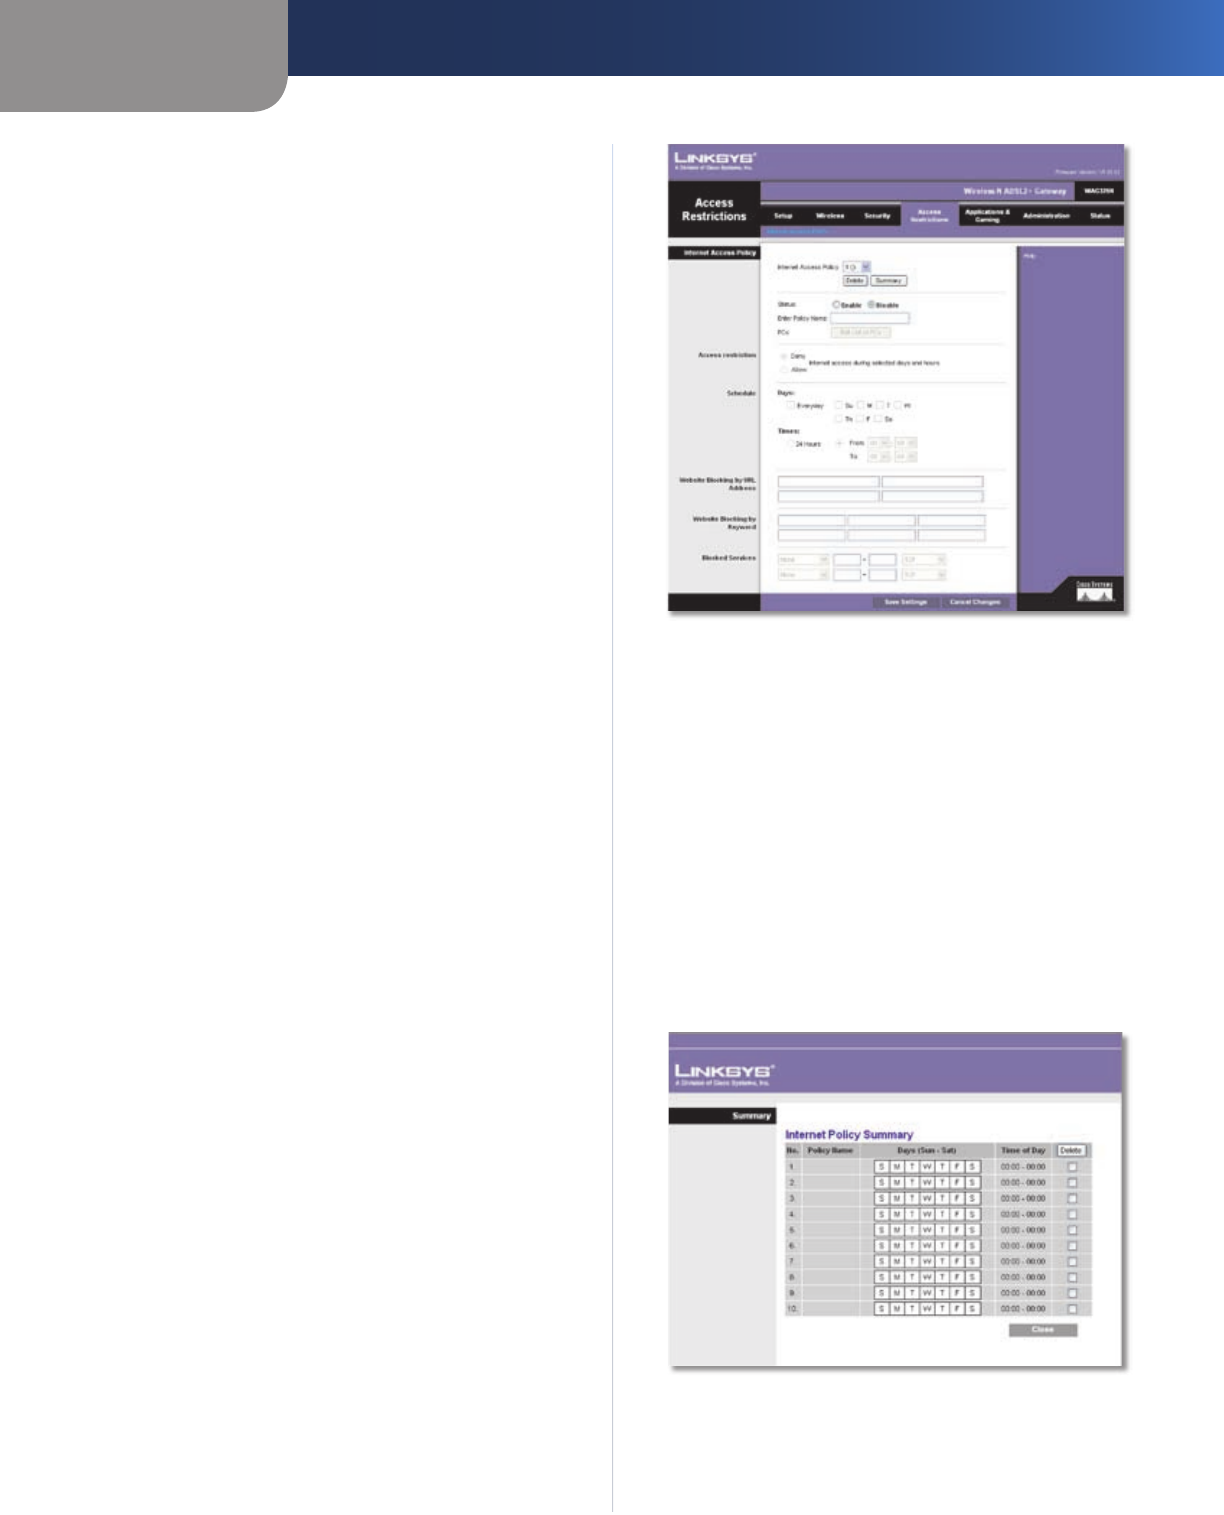
Access Restrictions > Internet Access Policy
The Internet Access Policy screen allows you to block or
allow specific kinds of Internet usage and traffic, such as
Internet access, designated services, and websites during
specific days and times.
Access Restrictions > Internet Access Policy
Internet Access Policy
Internet Access Policy Access can be managed by a
policy. Use the settings on this screen to establish an
access policy (after Save Settings is clicked). Selecting a
policy from the drop-down menu will display that policy’s
settings. To delete a policy, select that policy’s number
and click Delete. To view all the policies, click Summary.
Summary
The policies are listed with the following information: No.,
Policy Name, Days, and Time of Day. To delete a policy,
select Delete. To return to the Internet Access Policy screen,
click Close.
Summary
Status Policies are disabled by default. To enable a policy,
select the policy number from the drop-down menu, and
select Enable.


