


20
Wireless-N Router
Linksys E1000 Chapter 3: Advanced Configuration
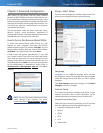
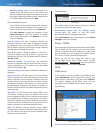
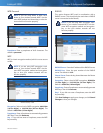
Manual Setup
If you set the Configuration View to Manual, the Basic
Wireless Settings screen displays the following fields.
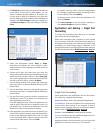
Wireless > Basic Wireless Settings (Manual Setup)
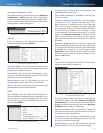
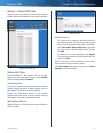
Network Mode From this drop-down menu, you can
select the wireless standards running on your network.
• Mixed If you have Wireless-N, Wireless-G, and
Wireless-B devices in your network, keep the default,
Mixed.
• BG-Mixed If you have only Wireless-G and Wireless-B
devices in your network, select BG-Mixed.
• Wireless-N Only If you have only Wireless-N devices,
select Wireless-N Only.
• Wireless-G Only If you have only Wireless-G devices,
select Wireless-G Only.
• Wireless-B Only If you have only Wireless-B devices,
select Wireless-B Only.
• Disabled If you do not have any wireless devices in
your network, select Disabled.
NOTE: If you are not sure which mode to use,
keep the default, Mixed.
Network Name (SSID) The Service Set Identifier (SSID)
is the network name shared by all devices in a wireless
network. It is case-sensitive and must not exceed
32 keyboard characters. The default is Ciscoxxxxx (xxxxx
are the last five digits of the Router’s serial number). The
serial number is located on the left side of the product
label, which is on the bottom panel.
Channel Width The default is 20 MHz Only. For best
performance, select Auto to have the Router automatically
select the Channel Width (20 MHz or 40 MHz).
Channel Select the appropriate channel for your wireless
network. If you are not sure which channel to select, then
keep the default, Auto.
SSID Broadcast When wireless clients survey the local
area for wireless networks to associate with, they will
detect the SSID broadcast by the Router. To broadcast the
Router’s SSID, keep the default, Enabled. If you do not
want to broadcast the Router’s SSID, then select Disabled.
Click Save Settings to apply your changes, or click Cancel
Changes to clear your changes.
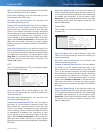
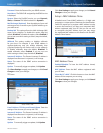
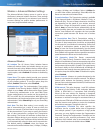
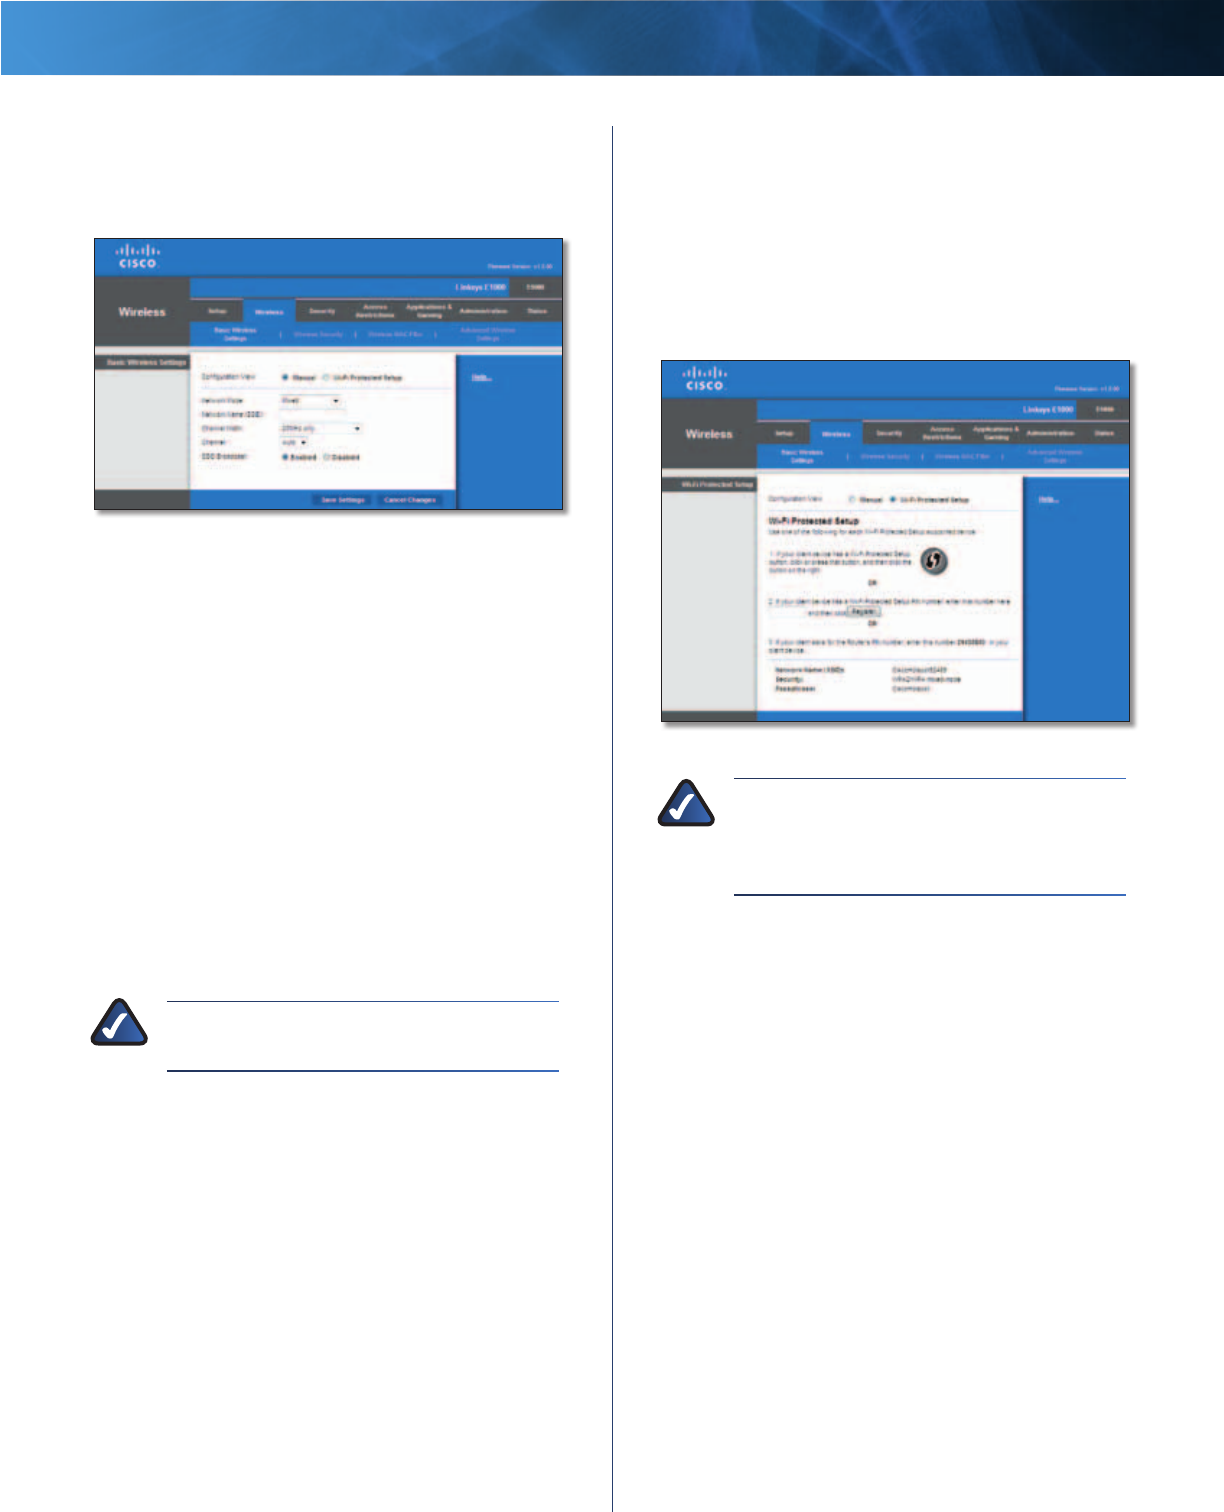
Wi-Fi Protected Setup
There are three methods available. Use the method that
applies to the client device you are configuring.
Wireless > Basic Wireless Settings (Wi-Fi Protected Setup)
NOTE: Wi-Fi Protected Setup configures one
client device at a time. Repeat the instructions
for each client device that supports Wi-Fi
Protected Setup.
• Wi-Fi Protected Setup Button Use this method if
your client device has a Wi-Fi Protected Setup button.
a. Click or press the Wi-Fi Protected Setup button on
the client device.
b. Click the Wi-Fi Protected Setup button on the
Router’s Wi-Fi Protected Setup screen.
The Wi-Fi Protected Setup LED flashes blue for two
minutes during the Wi-Fi Protected Setup process
and lights up blue when the Wi-Fi Protected Setup
process is successful.
The LED lights up amber if there is an error during
the Wi-Fi Protected Setup process. Make sure the
client device supports Wi-Fi Protected Setup. Wait
until the LED is off, and then try again.
The LED flashes when a Wi-Fi Protected Setup
session is active. The Router supports one session
at a time. Wait until the LED is continuously lit, or
off before starting the next Wi-Fi Protected Setup
session.
c. After the client device has been configured,
click OK on the Router’s Wi-Fi Protected Setup
screen. Then refer back to your client device or its
documentation for further instructions.