


Using the Command Line Interface 5-5
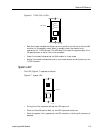
Configure the WAN Port
Set the Name Service
The INA module supports either the NIS or the DNS. See the PortMaster Configuration
Guide for more information on name services.
Use these commands to set the name service:
Command> set namesvc dns|nis
Command> save all
Once the name service is set, you must set the address of your NIS or DNS name server
and enter the domain name of your network.
Set the Name Server
The INA module supports RFC 1877, which allows remote hosts also supporting
RFC 1877 to learn the name of a server through PPP negotiation. You must provide the
IP address of the name server if you use a name service.
Use the following command to set the name server:
Command> set nameserver Ipaddress
Command> save all
Note – You can disable the use of a name service by setting the name server’s IP address
to 0.0.0.0.
Set the Domain Name
The domain name is used for hostname resolution. If you are using DNS or NIS, you
must set a domain name for your network.
Command> set domain String
Configure the WAN Port
ComOS automatically creates a WAN port that makes the high-speed dedicated
connection to the INA module. For example, if four PRI channels numbered 5, 6, 7, 8
have been assigned to the INA module, ComOS creates WAN port W4. With a data
capacity of 4 x 64Kbps or 256Kbps.
The WAN port number assigned by ComOS is based on the lowest channel number used
by the channel group minus one. For example, if T1/PRI channels 12, 13, 14, and 15 are
assigned to the INA module, port W11 is assigned to the group.
All data channels assigned to the INA module are initially placed in channel group 1. If
necessary you can configure the channel rate for this channel group.
More than one WAN port can be configured if different groups of T1/PRI channels serve
more then one destination. Additional WAN ports must be separately configured with IP
address, netmask, protocol, channel speed, and any other desired parameters. See “Set
Up Additional WAN Ports” on page 5-6.