


24
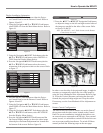
3. Reselect the memory location from step one and then
press the SELECT/ENTER Push-button.
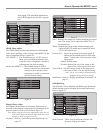
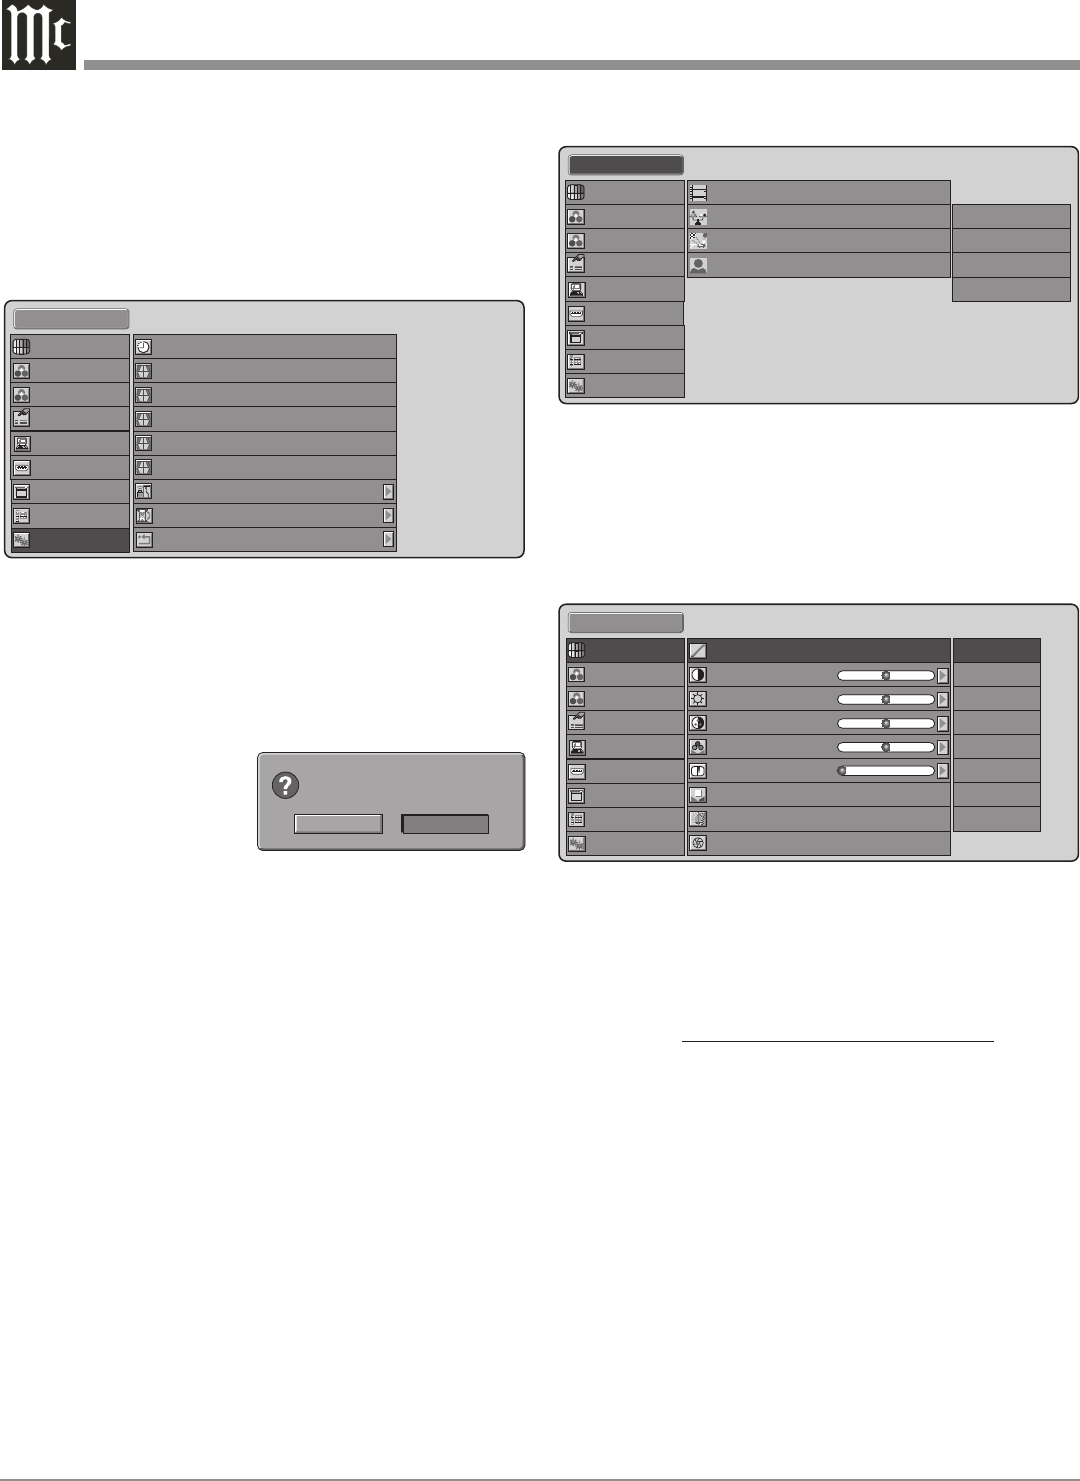
Picture Adjust Menu
There are various image adjustments available as follows:
Refer to figure 24.
Gamma - There are eight different settings changing a
narrow range of the gray scale.
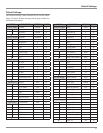
Color Temp. - The Color Temperature affects to what de-
gree of neutrality the gray scale is.
Setting - Color Temperature (° Kelvin)
1 5250° K (overall reddish tint)
2 5800° K (slightly overall reddish tint)
3 6500° K (most neutral, default setting)
4 7500° K (slightly overall bluish tint)
5 9300° K (overall bluish tint)
HB High Bright (Display brightest image)
Lamp Mode - The Normal setting provides a brightly il-
luminated image with reasonable projector
lamp life. The Economy setting has slightly
reduced illumination with an increase in
lamp life.
Iris - The settings effect the overall image brightness and
contast. The “1” setting will increase the contrast
and decrease the brightness of the image. The “3”
setting will decrease the contrast and increase the
brightness of the image.
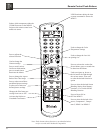
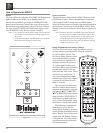
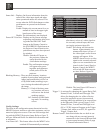
1. Press the MENU Push-button on either the Projec-
tor Control Panel or on the Remote Control. Refer to
figures 14 and 15.
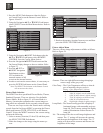
2. Using the Navigation ▲UP or ▼DOWN Push-button,
select CONFIG. from the Main Menu choices. Refer to
figure 21.
3. Using the Navigation ►RIGHT Push-button plus the
▲UP or ▼DOWN Push-button, select REMOTE
CONTROL from the Config. Menu choices.
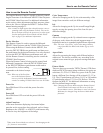
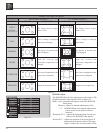
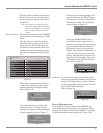
4. Press the Navigation ►RIGHT Push-button and the
On-Screen Display changes to show a window. Refer
to figure 22.
5. Press the ◄LEFT or
►RIGHT Navigation
Push-button to select
YES to disable the
enternal sensors or NO
to activate the internal sensors.
6. In order to activate the sensor choice, it is necessary to
press the ENTER Push-button on the Control Panel.
Note: The SELECT Push-button on the Remote Control
will not activate the choice.
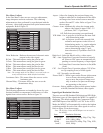
Picture Mode Selection
The MDLP2 has three predefined Picture Modes; Theater,
Standard, Dynamic. There are also nine User definable
Picture Modes. Refer to figure 23. A Picture Mode is a
Memory Location that remembers the current image set-
tings which are adjustable for the currently selected input.
There are two ways to select the Picture mode: selecting
a mode from the On-Screen MENU or pressing the Picture
Mode push-buttons (THTR, STD, DYN) on the Remote
Control. To have the MDLP2 memorize the current setting
perform the following:
1. Select a memory location (U1 thru U9) and then press
the SELECT/ENTER Push-button.
2. Make the changes to the image using the menu sys-
tem.
Wireless
?
9ES .O
Figure 22
Standard 1
Auto Power Off
Trigger 2 Full
Trigger 2 Normal
Trigger 2 Zoom
Enable
On
On
On
Trigger 2 V-stretch On
Trigger 2 Through On
Reset Lamp Life
Reset All
Remote Control
Fine Menu 1
Fine Menu 2
Input Signal
RGB/HD Adjust
Display
OSD/Blanking
Config.
HDMI
Picture Adjust
Figure 21
Theater
Standard
Dynamic
User
Default
1
Default
1
Standard 1
2
3
1
Default
Fine Menu 1
Fine Menu 2
Input Signal
RGB/HD Adjust
Display
OSD/Blanking
Config.
HDMI
Picture Adjust
Figure 23
User 1
Gamma
Contrast
Brightness
Color
Tint
0
0
0
0
A
C
D
E
B
A
Theater
Standard
Dynamic
Fine Menu 1
Fine Menu 2
Input Signal
RGB/HD Adjust
Display
OSD/Blanking
Config.
HDMI
Picture Adjust
3
Lamp Mode
Color Temp.
Normal
Iris
3
Sharpness
0
Figure 24