IP Routing
3-207
3
Basic IP Interface Configuration
To allow routing between different IP subnets, you must enable IP Routing as
described in this section. You also need to you define a VLAN for each IP subnet
that will be connected directly to this switch. Note that you must first create a VLAN
as described under “Creating VLANs” on page 3-140 before configuring the
corresponding subnet. Remember that if you need to manage the switch in-band
then you must define the IP subnet address for at least one VLAN.
Command Attributes
• IP Routing Status – Configures the switch to operate as a Layer 2 switch or as a
multilayer routing switch. (Options: Disable this field to restrict operation to Layer 2
switching; enable it to allow multilayer operation at either Layer 2 or 3 as required.)
- This command affects both static and dynamic unicast routing.
- If IP routing is enabled, all IP packets are routed using either static routing or
dynamic routing via RIP or OSPF, and other packets for all non-IP protocols
(e.g., NetBuei, NetWare or AppleTalk) are switched based on MAC addresses.
If IP routing is disabled, all packets are switched, with filtering and forwarding
decisions based strictly on MAC addresses.
• Default Gateway – The routing device to which the switch will pass packets for all
unknown subnets; i.e., packets that do not match any routing table entry. (Valid IP
addresses consist of four numbers, 0 to 255, separated by periods.)
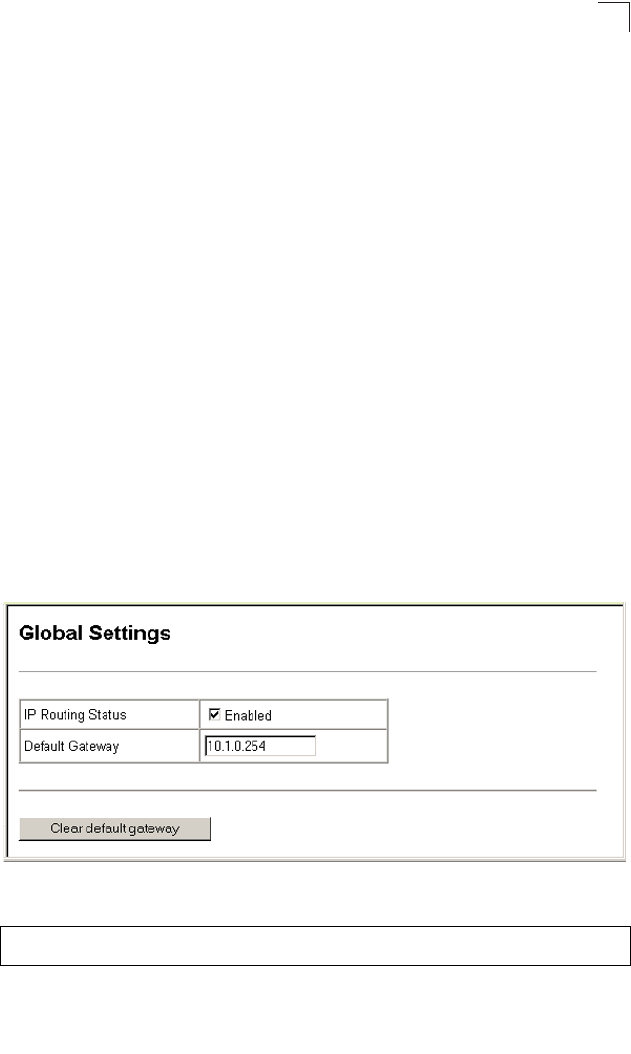
Web - Click IP, General, Global Settings. Set IP Routing Status to Disabled to restrict
operation to Layer 2, or Enabled to allow multilayer switching, specify the default
gateway which will be forwarded packets for all unknown subnets, and click Apply.
Figure 3-118 IP Global Settings
CLI - This example enables IP routing, and sets the default gateway.
Console(config)#ip routing 4-249
Console(config)#ip route default 10.1.0.254 4-250


