


Chapter 3: Installation 19
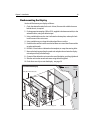
Flush mounting the Display
You should flush mount your display as follows:.
1. Check the selected location for the unit. A clear, flat area with suitable clearance
behind the unit, is required.
2. Fix the appropriate template - E80 or E120, supplied in the document wallet, to the
selected location, using self-adhesive tape.
3. Using a suitable hole saw, the size is indicated on the template, make a pilot hole
in each corner of the cut-out area.
4. Using a suitable saw, cut along the inside edge of the cut-out line.
5. Ensure that the unit fits into the area that has been cut out and then file around the
cut edge until smooth.
6. Drill four 4.5 mm holes as indicated on the template, to accept the securing bolts.
7. Remove the backing tape from the panel seal and place the seal onto the display
unit and press firmly onto the flange.
8. Connect all the cables that are in use to the rear of the display, avoiding tight bends.
9. Slide the unit into the console and secure using the bolts supplied.
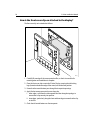
10.Fit the front cover clip-on onto the display - see
page 20
.
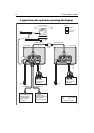
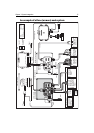
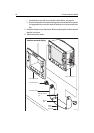
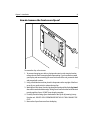
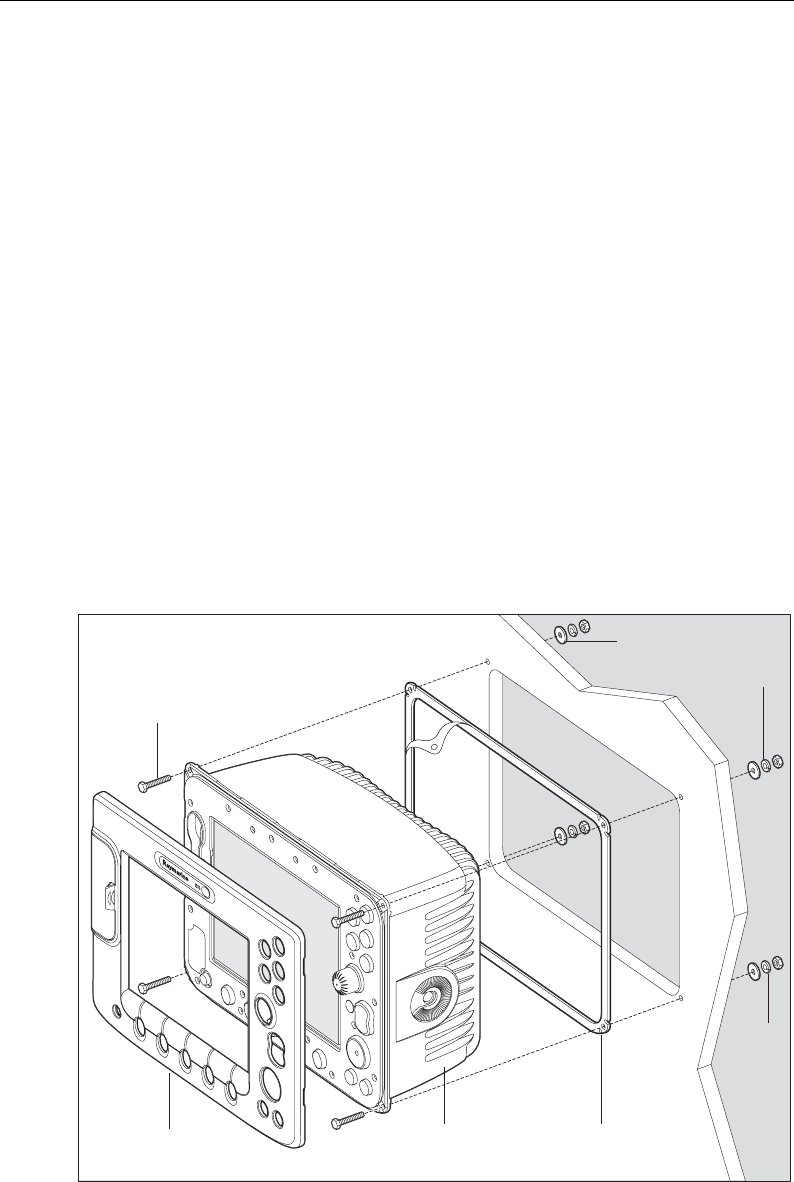
Flush mounted display
D7212_1
E-series display unit
Bolt, M4 x 40 hexhead (x4)
Spring
washer,
M4 (x4)
Washer,
M4 (x4)
Nut,
M4 (x4)
Front cover clip-on Panel seal