


26 E-Series Installation Manual
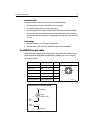
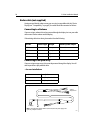
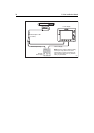
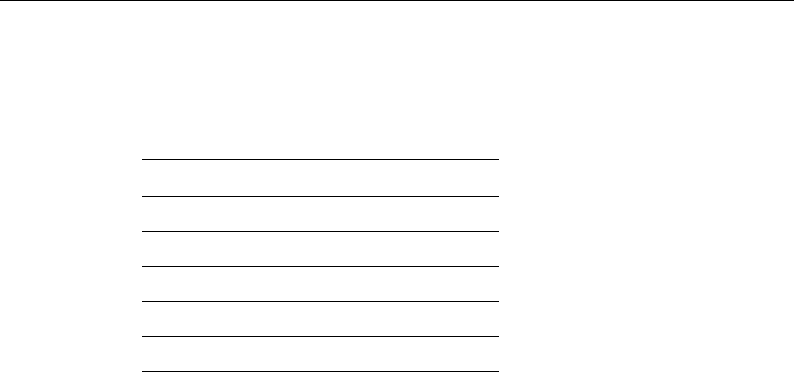
NMEA 0183 cable
The NMEA 0183 cable is supplied with exposed wire connecting tails. These should be
connected to your existing NMEA instruments using suitable connector blocks:
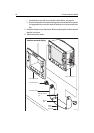
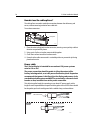
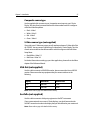
SeaTalk High Speed cable
CAUTION: Water ingress
Failure to adhere to the following may result in the ingress of water and
permanent damage to the display:
• Do not remove the SeaTalk High Speed blanking plug from the rear of
the display until such time as you are ready to connect the cable.
• When inserting the cable, ensure that it is clicked AND then turned, in
order to lock it into place and create a watertight connection.
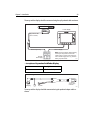
How the SeaTalk High Speed cable connects depends on whether you are integrating
your E-Series Display into a two node, or 3-or-more node system.
Two node system
Connect the cable by way of the crossover coupler to either:
• The display unit and a DSM300.
OR
• Two displays units.
3 or more node system
Connect the display unit(s) to the SeaTalk High Speed Network switch (E55058).
Note:
Please refer to page 11 for diagrams of these two systems.
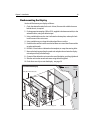
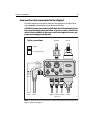
Video In cable
Your E-Series display will support on-board cameras, DVD or video players etc. using
composite or S-Video source type. If you have an E-Series network, you will need to
connect the input source to the individual display on which it is to be viewed as video
images cannot be seen across the SeaTalk High Speed network. Your display is
supplied with a composite cable. If you require an S-Video cable, please order part no.
E55062.
Function Color Pin no.
NMEA Input (-ve) common Green 1
NMEA Input (+ve) White 2
NMEA Output (+ve) Yellow 3
NMEA Output (-ve) common Brown 4
Not connected Screen 5