


Setting up your Router with the SmartStart Wizard 5-7
DD
DD
yy
yy
nn
nn
aa
aa
mm
mm
ii
ii
cc
cc
cc
cc
oo
oo
nn
nn
ff
ff
ii
ii
gg
gg
uu
uu
rr
rr
aa
aa
tt
tt
ii
ii
oo
oo
nn
nn
((
((
rr
rr
ee
ee
cc
cc
oo
oo
mm
mm
mm
mm
ee
ee
nn
nn
dd
dd
ee
ee
dd
dd
))
))
If you configure your Netopia R5000 Series using SmartStart, you can accept the dynamic IP address assigned
by your router. The Dynamic Host Configuration Protocol (DHCP) server, which enables dynamic addressing, is
enabled by default in the router. If your PC is not set for dynamic addressing, SmartStart will offer to do this for
you if you select the Easy setup option. In that case, you will have to restart your PC and relaunch SmartStart.
If you configure your PC for dynamic addressing in advance, SmartStart need only be launched once. To
configure your PC for dynamic addressing do the following:
Note: You can also use these instructions to configure other computers on your network to accept IP addresses
served by the Netopia R5000 Series.
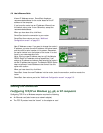
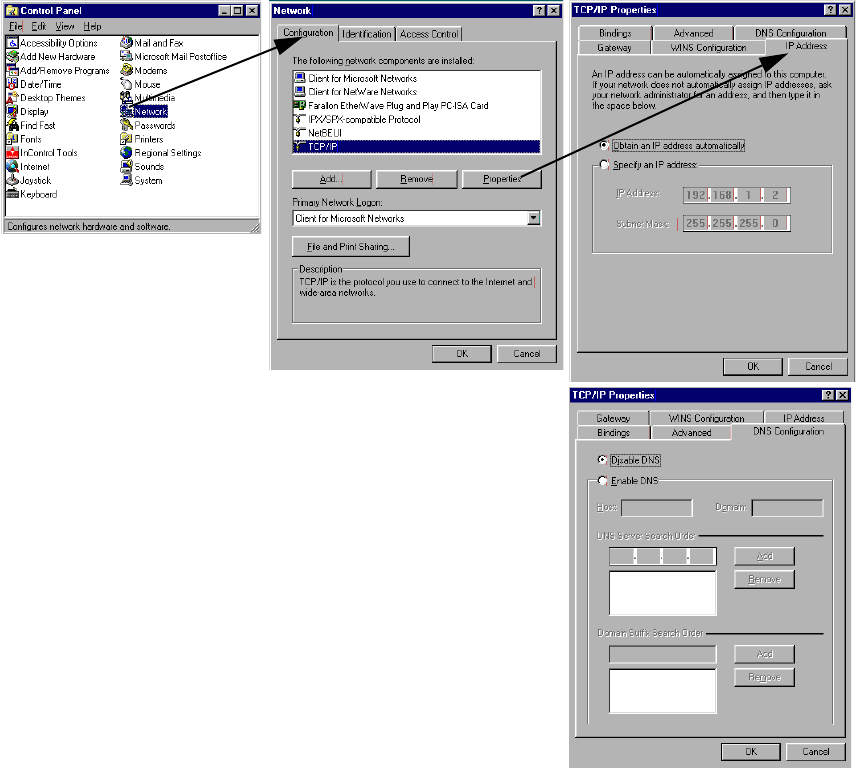
1. Go to the Start
Menu/Settings/Control
Panels and double click
the Network icon. From
the Network components
list, select the
Configuration tab.
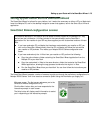
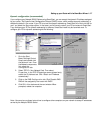
2. Select TCP/IP-->Your Network Card. Then select
Properties. In the TCP/IP Properties screen (shown here),
select the IP Address tab. Click “Obtain an IP Address
automatically”.
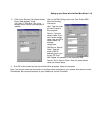
3. Click on the DNS Configuration tab. Click Disable DNS.
DNS will be assigned by the router with DHCP.
4. Click OK in this window and the next window. When
prompted, reboot the computer.