


6160
DETAILED OPERATION
Shooting in Each Exposure Mode—continued
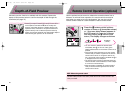
Exposure Compensation
To modify exposure control (i.e. from the ISO standard), use the Exposure
Compensation function. This can be useful when intentionally achieving
under or overexposure to obtain a specific photographic effect.
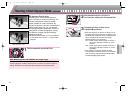
1
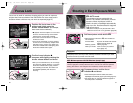
Set Exposure Compensation by rotating
the Command Dial while pressing the ∆
button until the desired compensation
value appears (–2 EV to +2 EV in 1/2
steps).
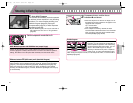
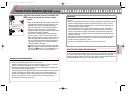
•When the Exposure Compensation is set, =
appears in the LCD panel and viewfinder. The
compensation value can be checked by pressing
the ∆ button. The electronic analog exposure
display also appears as illustrated in the viewfinder
when the ∆ button is pressed.
•Normally, you should compensate exposure to the
+ side when the background is brighter than your
main subject, or to the – side when the background
is darker.
Electronic analog
exposure display
–0.5 EV compensation
+2 EV compensation
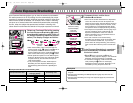
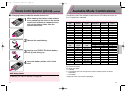
Exposure mode with Exposure Compensation
Exposure Compensation can be set in P (Auto-Multi Program), S (Shutter-
Priority Auto), A (Aperture-Priority Auto) and Vari-Program. Once the Exposure
Compensation is set in each P, S or A exposure mode, compensation remains
in that exposure mode. Changing the exposure mode to M, a AUTO or Vari-
Program temporarily cancels the compensation. Exposure Compensation set in
Vari-Program is cancelled when exposure mode is changed. The Exposure
Compensation cannot be set in a AUTO or M exposure mode.
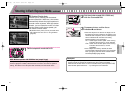
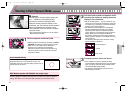
2
Compose picture, confirm focus
indicator / and shoot.
•To cancel Exposure Compensation, rotate the
Command Dial while pressing the ∆ button to reset
the compensation value to 0.0. In Vari-Program,
changing the exposure mode also cancels the
Exposure Compensation. (Turning the power switch
off does not cancel the Exposure Compensation.)
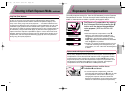
Long Time (Time) Exposure
Rotate the Command dial to set the shutter speed indication to -- (next after
30 sec.) to set Long Time (Time) exposure. Depressing the shutter release
button once opens the shutter and the self-timer lamp flickers slightly once
every 2 sec. during Long Time (Time) exposure. -- and other indications such
as aperture are displayed in the LCD panel, but all the indications turn off in the
viewfinder. Lightly press the shutter release button again to close the shutter.
This function is useful for shooting nighttime scenes or stars. Camera shake can
be reduced by using the Self-Timer (page 40), Remote Control (page 69) and
tripod. Continuous exposure is possible for approx. 4 hours with a fresh set of
batteries. Note that continuous exposure time is reduced when shooting in low
temperatures, and Auto Exposure Bracketing (page 62) cannot be performed
during Long Time (Time) exposure.
F65 (E) 02.12.27 5:43 PM Page 60