


61
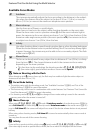
Features That Can Be Set Using the Multi Selector
Shooting Features
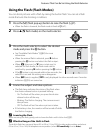
Using the Flash (Flash Modes)
You can shoot pictures with a flash by raising the built-in flash. You can set a flash
mode that suits the shooting conditions.
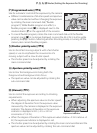
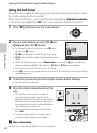
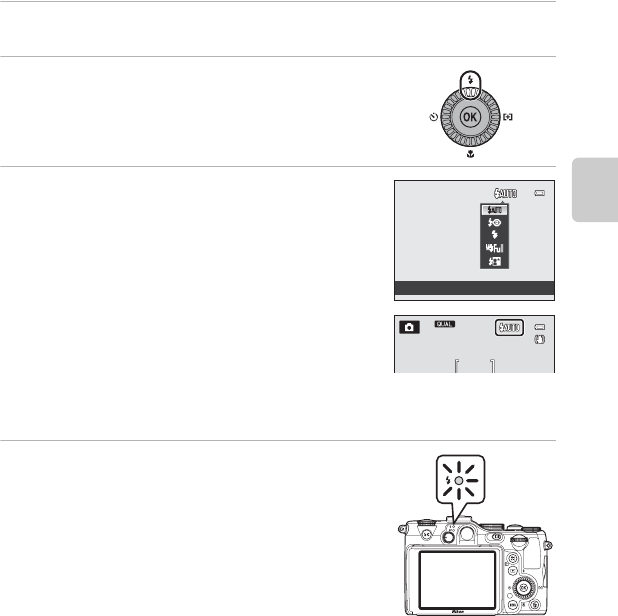
1 Press the K (flash pop-up) button to raise the flash (A7).
• When the flash is lowered, the flash mode is fixed at W (off ).
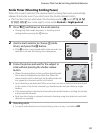
2 Press H (m flash mode) on the multi selector.
3 Press the multi selector to select the desired
mode and press the k button.
• See “Available Flash Modes” (A62) for more
information.
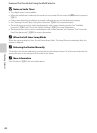
• When the manual flash is selected, press K before
pressing the k button and select the flash output.
• When Y (slow sync) or Z (rear-curtain sync) is
selected for flash mode, the flash mode can be
switched by pressing K before pressing the k button.
• If the k button is not pressed within a few seconds, the
selection is set and the setting menu disappears.
• When U (auto) is applied, D is only displayed for a few seconds even if monitor
indicators (A15) are turned on.
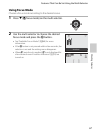
4 Frame the subject and take a picture.
• The flash lamp indicates the status of the flash when
the shutter-release button is pressed halfway.
- On: The flash will fire when you press the shutter-
release button all the way.
- Blinking: The flash is charging. The camera cannot
take pictures.
- Off: The flash will not fire when a picture is taken.
• If the battery is low, the monitor will be turned off while
the flash is charging.
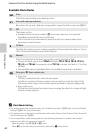
C Lowering the Flash
When not using the flash, gently push to lower the flash until it clicks shut (A7).
C Effective Range of the Built-in Flash
The built-in flash has a range of about 0.3 to 9.0 m (1 ft to 29 ft) for wide-angle position, and about
0.3 to 4.5 m (1 ft to 14 ft) for telephoto zoom position (when ISO sensitivity is set to Auto).
Flash mode