1-3 Using the Touch Panel Display
8
1
Getting to Know Your Copier
Using the Touch Panel Display
The features shown on the display
(includes message in the message
area or the screen) will depend on
the installed options and the model
of the machine. In the above
example, Tray 6 (High Capacity
Feeder), and Finisher are installed.
For models with the printer feature,
see the
Operating Instructions (For
Printer).
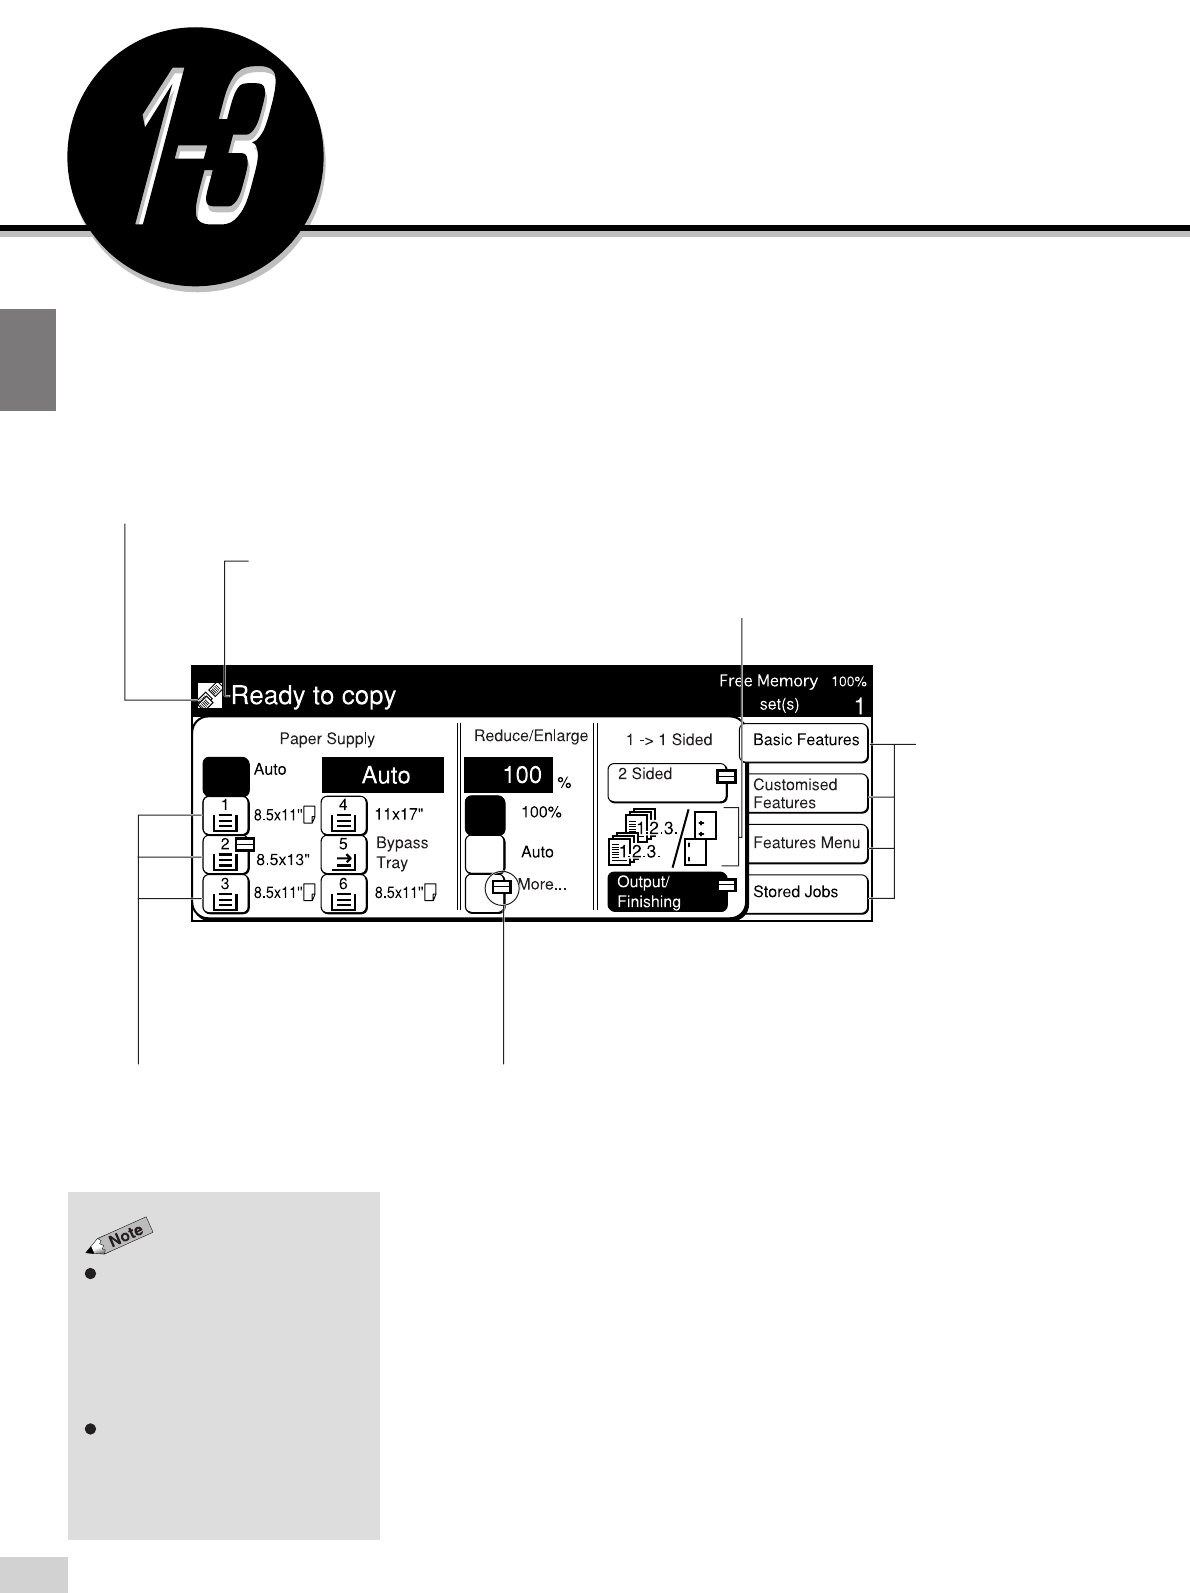
You can select a feature shown on the Touch Panel display by touching its
corresponding button on the display. Here, the Basic Features screen is
used to explain the respective parts of a screen.
In this section, the Touch Panel display will be referred to as the “display”.
Feature Status Mark
The status of a feature is indicated by a mark.
Message Area
The status of the machine and its operating
instructions are displayed here. The number on
the right indicates the number of sets to be copied.
Feature Icon
Explanation on a feature and its settings
are represented pictorially.
Feature Button
Touch this button to select or program a
feature. The currently selected button is
highlighted.
Pop-up Mark
This mark indicates that the button has a pop-up
screen for additional selections. Select this button
to display the pop-up screen.
Select one of these
buttons to change
the display.
The above Paper Supply display is a sample.
Each default setting is
Tray 1 : 8.5 x 11" (A4)
Tray 2 to 4 : 11 x 17" (A3)
Tray 6 : 8.5 x 11" (A4).
Above Trays can be changed.
