


LC2H
102
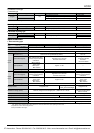
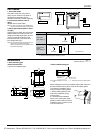
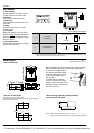
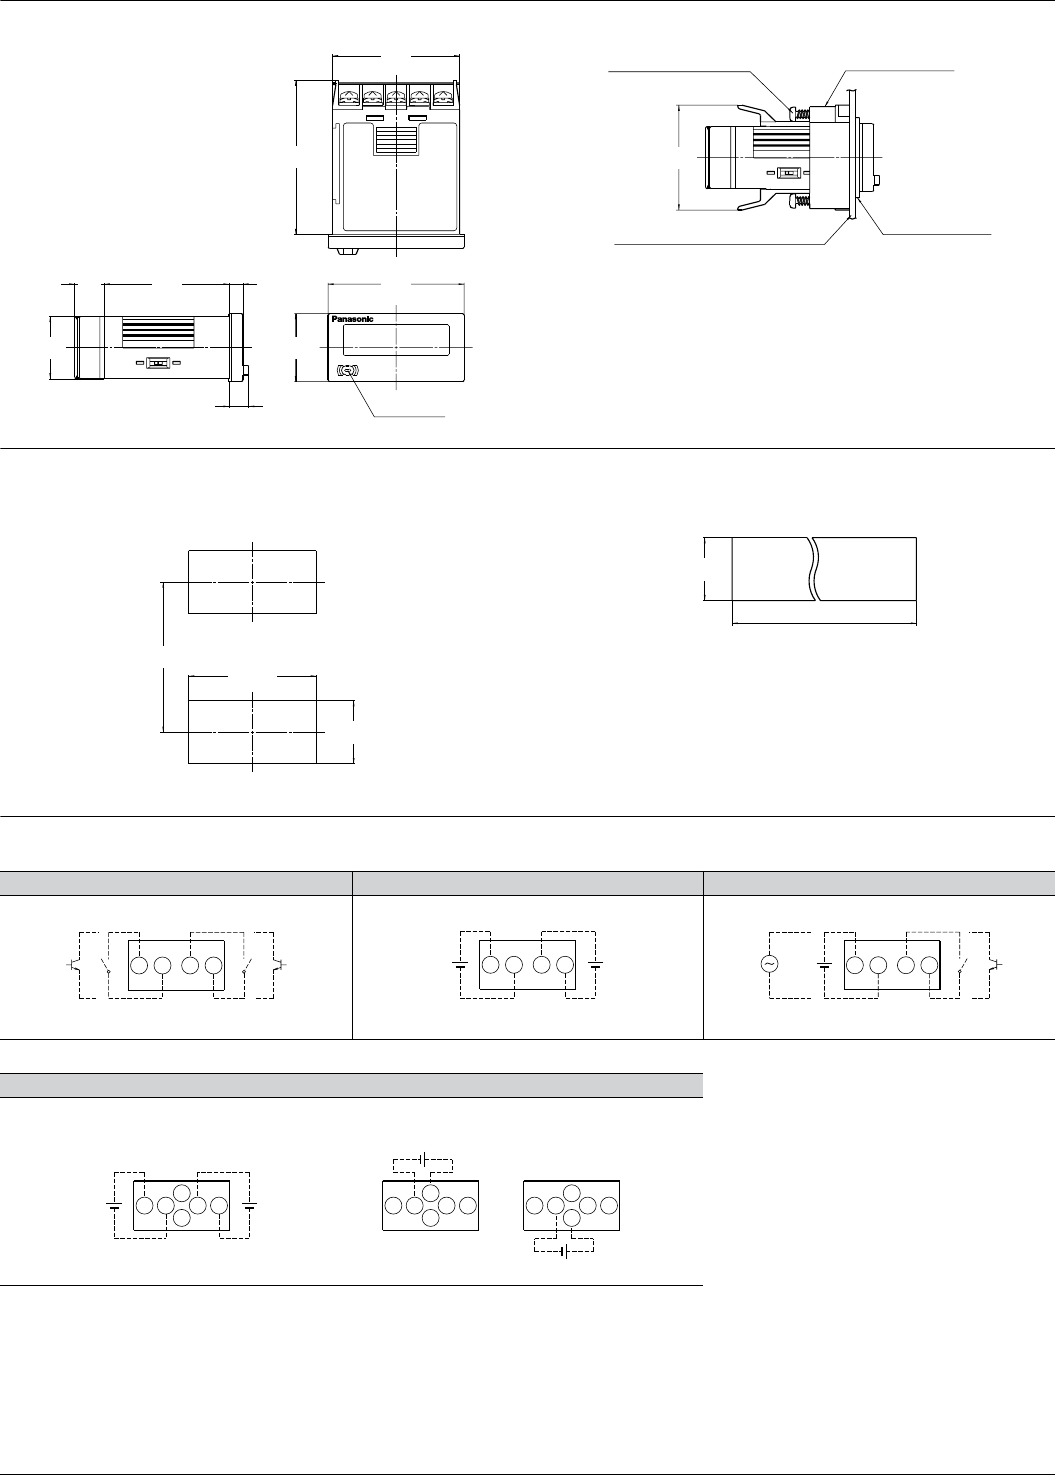
• Terminal layout and wiring diagrams
1) Standard type
2) Backlight type
Non voltage input type Voltage input type Free voltage input type
Voltage input type
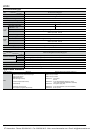
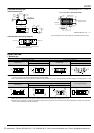
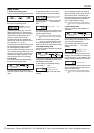
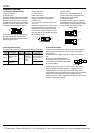
2) Installation frame type • Panel mounting diagram
44.8
1.764
54.4
2.142
5
.197
44
1.732
10.4
.409
7
.276
22
.866
48
1.890
24
.945
Reset button
COUNTER
LC2H
RESET
37
1.457
Mounting screws
(found on mounting frame)
Mounting frame
ATH3803 (included)
Rubber gasket
ATH3804 (included)
Panel
(1 to 4.5mm .039 to .177inch thickness)
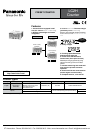
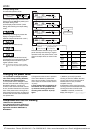
• Panel cut-out dimensions
The standard panel cut-out is shown below.
Use the mounting frame (ATH3803) and the rubber packing (ATH3804).
(Only installation frame type.)
• For connected installation (sealed installation)
(Only installation frame type.)
Notes) 1. Suitable installation panel thickness is 1 to 4.5 mm .039 to .177 inch.
2. Waterproofing will be lost when installing repeatedly (sealed installation).
45
1.772
+0.5
0
+.020
0
22.2
.874
+0.5
0
+.020
0
60 min.
2.362 min.
22.2
.874
+0.5
0
+.020
0
A=(48×n-2.5)
A=(1.890×n-.098)
A
+1.0
0
+.039
0
W-R are connected internally.
Count input
2143
Reset input
+V
0V
+V
0V
2143
Count input Reset input
21or 43
Count input Reset input
Backlight
+V0V
<When red><When green>
+V0V
+V
0V
+V
0V
Count input Reset input
12
5
6
34 12
5
6
34 12
5
6
34
CTi Automation - Phone: 800.894.0412 - Fax: 208.368.0415 - Web: www.ctiautomation.net - Email: info@ctiautomation.net