


56
≥Electrical noise, static electricity or failure
of the SD Multi AV Device or the Memory
Card may damage the Memory Card or
erase the data stored on the Memory
Card. It is recommended to save
important data onto a personal computer.
≥Some cards may pop out when they are
removed.
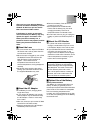
ª Using the LCD Monitor (l 12)
≥Forcefully rotating the LCD Monitor
beyond ranges described in these
operating instructions will damage the SD
Multi AV Device.
≥Do not carry or store the SD Multi AV
Device with the LCD Monitor facing
upward. Otherwise, the LCD Monitor may
be damaged.
≥When the LCD Monitor is closed with its
display section facing outward, operation
with the Multi-function Button or [MENU]
Button is disabled. You can perform the
function such as playing back, recording
and adjusting the volume, etc. with the
remote controller.
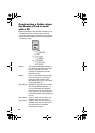
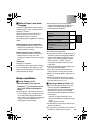
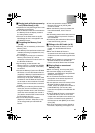
≥The LCD Monitor may
appear on the video to be
recorded at some monitor
set angles. Even if the
LCD Monitor may not be
viewed through the lens,
it may appear if the video
is viewed on a personal computer or if it is
printed.
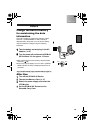
ª Using the Remote Controller/
Earphones (l 12)
≥Use the earphones supplied or one with a
cord of 10 ft. (3 m) or less.
≥The earphones can be attached to the
main unit directly without using the remote
controller.
≥If the earphones/remote controller are
attached, the sound will not be output from
the speaker.
≥When the SD Multi AV Device is not
turned [OFF] (is in the standby mode),
press the
[
■/1
●
]
button on the remote
controller to activate it.
≥The equalizer [EQ] is operational only
when playing back music files.
ª Turning the Power On/Selecting
Operation Modes (l 13)
≥If the SD Multi AV Device is not used for
10 minutes or longer, the power is
automatically turned off. Set the Power/
Mode Switch to [OFF] and turn it back on.
ª Using the Menu Screen (l 14)
≥To abort the setting, press the [MENU]
Button.
≥While a Menu is displayed, you cannot
record or play back.
≥The menu screen does not appear during
recording.
ª Setting Date and Time (l 17)
≥The built-in battery sustains the operation
of the clock.
≥The clock might cause a deviation from
the correct date and/or time, so be sure to
check the current date and/or time before
recording.
≥If the [PRESS MENU TO SET CLOCK]
indicator is displayed, set the date and
time after the battery has charged. (l 49)
ª Setting the Power Supply
Frequency (l 18)
≥This setting may not completely suppress
the horizontal stripes.
≥If this mode is used for outdoor recording,
the entire image on the screen (or
recording images) may be tinged with
white.
≥This mode cannot be set or released while
recording.