


COMSPHERE DualFlow Data Service Units
4-14 December 1996 3615-A2-GB20-20
To view the configuration loaded:
. Procedure
1.
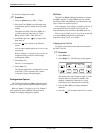
Select an
option set (e.g., DSU – F2 key).
2. Press the F1 key (Next) to scroll through each
configuration option’s default (factory-loaded)
setting.
The option sets (DSU, DSU Port, DBM, etc.)
scroll from the last to the first (e.g., Diag!
Bkup!SAVE!DSU!DSU Port, etc.).
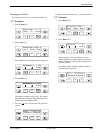
3.
Select
Prev
(press the
key to display Prev,
then select it).
4.
Press the
key to return to the Edit/Save
screen.
Y
ou can select another option set to view
, or you
can proceed.
Refer to Chapter 5,
Configuring the Unit
, for an
example showing you how to edit (change)
configuration options.
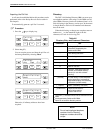
5.
Select
Save (F1).
The
Save to
screen appears.
6. Select Activ (F1).
The selected application’
s configuration is saved
to the DSU’
s Active operating area, and the
Command Complete
message appears.
Configuration Options
The Configuration Options (Opts
) subbranch allows
you to save, copy
, and/or change configuration options.
Refer to Chapter 5,
Configuring the Unit
. Chapter 5
fully explains the Opts
subbranch, and provides an
example of changing configuration options.
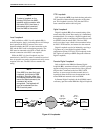
Poll List
The Poll List (PList
) subbranch maintains or changes
the DBM’
s poll list. A control DBM’
s poll list includes
the tributary DSU and DBM one level downstream, and
only a control can acquire a poll list.
Y
ou can display
, clear, change, or acquire a poll list. If
you select
Clr (Clear) from the Poll List
screen, all
network addresses are erased from the DBM’
s poll list.
PList is
only available from the Local branch,
and only
to a control DBM configured for nondisruptive
diagnostics (
Diag Type
is set to NonD).
Displaying the Poll List
To
display each of the network addresses included in
the DSU’
s poll list:
. Procedure
1.
Select
PList (F2).
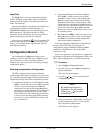
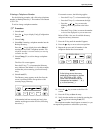
2.
Select
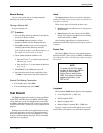
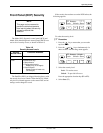
Displ (F1). The following screen appears:
F1
Addr: 2 Active
F2
F3
The number after Addr (in this example, 2) is the
network address of the poll list member. The
member is identified as either Active or Skip
(identified via the Change Poll List function).
3.
Press the
F1 or F2
key to display additional
addresses.
4.
Press the
key to return to the Poll List
screen.