Pelco Manual C1921M-G (1/04) 21
CAMERA SETUP (NUMBER AND CAM KEYS)
OPEN
CLOSED
VIDEO INPUT TERMINATION 75 OHM
ALARM INPUT NORMALLY OPEN
COAXITRON FORMAT EXTENDED
ACTIVITY DETECTION ENABLED
SET DETECTION MASK
ENABLED
DISABLED
*
* ONLY NINE CHARACTERS APPEAR WHEN IN THE 16-CAMERA DISPLAY.
EXTENDED
OFF
STANDARD
CAMERA 1 NORMAL
NORMAL
COVERT
ä
à
á
â
c
ê
ë
è
ï
î
ì
‹
›
, (COMMA)
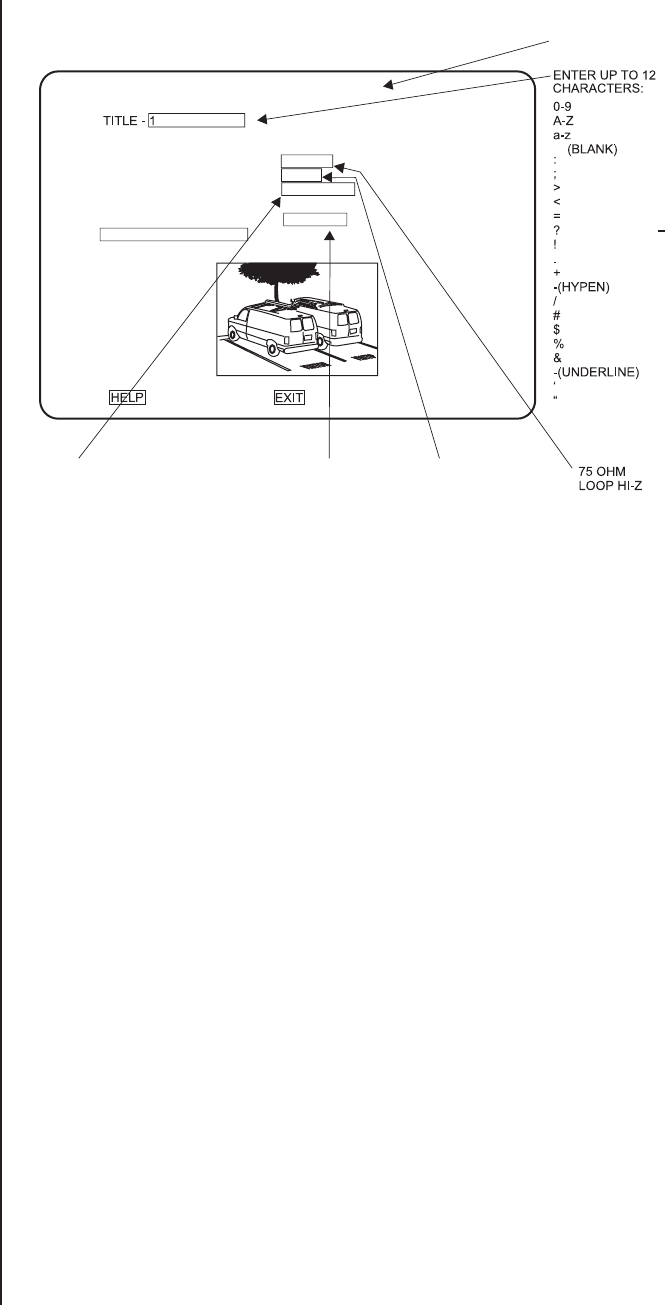
Figure 9. Basic Camera Menu
To program a camera input:
1. Press the MAIN MONITOR key.
2. Select the camera.
Addressing by Multiplexer (Switch 7 OFF)
a. On the number pad, enter the multiplexer’s address number (1-16 if the keyboard
is connected to a multiplexer; 1-8 if the keyboard is connected to a server), and
then press the UNIT key.
b. On the number pad, enter the camera’s number, and then press and hold the
CAM key until the Camera menu appears.
Addressing Consecutively (Switch 7 ON)
On the number pad, enter the camera’s number, and then press and hold the CAM
key until the Camera menu appears. Refer to Table A for camera numbers.
3. A video appears showing the camera view. This helps ensure you selected the correct
camera and lets you see what effect selecting a menu option has on the video. The
currently selected menu item blinks.
4. Use the joystick to move among items on the screen. When the menu item you desire
is highlighted (blinking), press the OPEN key to cycle through the options to select the
one you want. Move the joystick to the right to advance to the next character position
when titling a camera.
Normal/Covert Mode
• NORMAL – Use when you want the camera view to appear on the monitor. This
is the default.
• COVERT – Use when you want to record a camera view but do not want the
picture to appear on the monitor. The monitor will show only the camera number
on a black background; however, the videotape will record what the camera
sees. (You might use this if you do not want the operator or visitors to see the
picture but want it recorded.) You can set each camera individually.


