


74 PI-SCX System Manual Version 2.E
74
5. Using Notepad or a similar text editor, open PVCAM.INI, which is located in
the Windows directory (C:\Windows, for example).
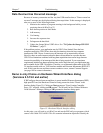
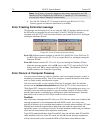
If the contents of the file look like:
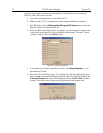
Change the headings so the contents now look like:
[Camera_1]
Type=1
Name=Camera1
Driver=rspipci.sys
Port=0
[Camera_2]
Type=1
Name=Camera2
Driver=apausb.sys
Port=0
[Camera_2]
Type=1
Name=Camera1
Driver=rspipci.sys
Port=0
[Camera_1]
Type=1
Name=Camera2
Driver=apausb.sys
Port=0
Note: The [Camera_#] must be changed so the camera supported by the USB
interface will be recognized (the USB driver is "apausb.sys"). For consistency,
you may also want to change the camera names.
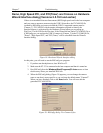
6. Save the file. With the ST-133 connected and on, open WinView/32.
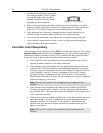
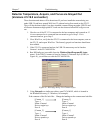
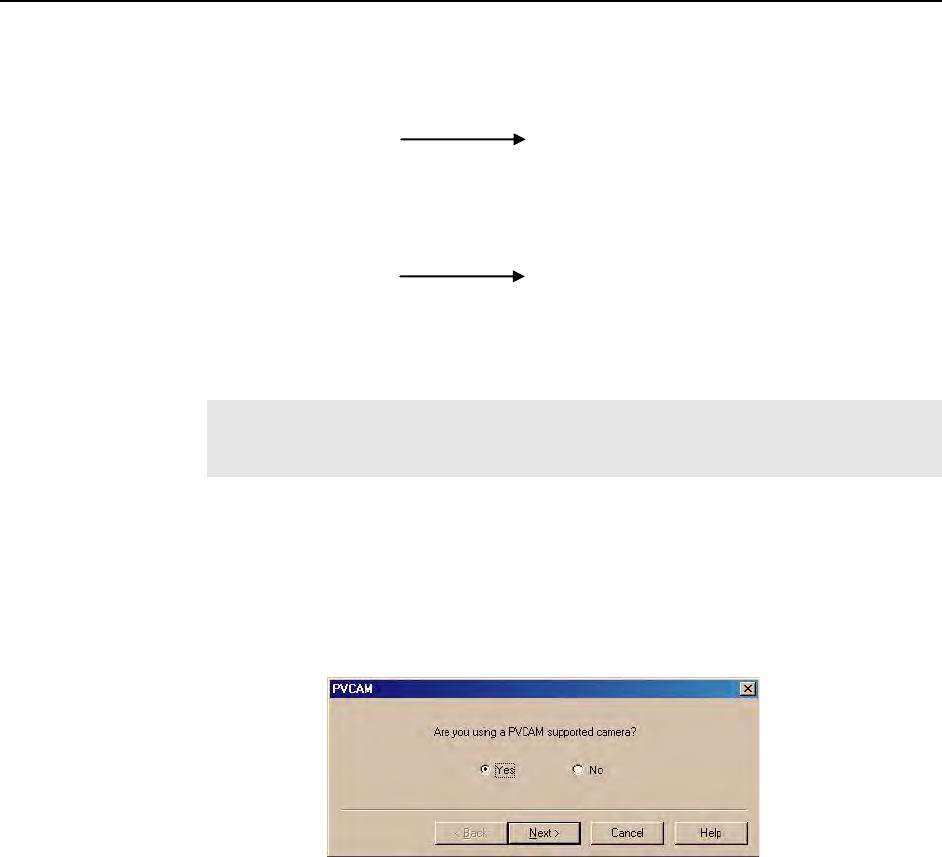
7. Run the Hardware Wizard.
8. When the PVCAM dialog (Figure 40) is displayed, click in the Yes radio button,
click on Next and continue through the Wizard. After the Wizard is finished, the
Controller/Camera tab card will be displayed with the Use PVCAM checkbox
selected. You should now be able to acquire data.
Figure 40. Hardware Wizard: PVCAM dialog