3 Installing
3.4 Recognition of USB Monitor Board
From installer version “V.2.04”, the FoUSB installer has an automatic USB Driver install function
(Refer to [3.3 FoUSB (Flash-over-USB) installing].). This section explains recognition of USB
Monitor Board when confirming this function and installing FoUSB.
When this function is not confirmed, please perform installation of a USB Driver, and recognition of
USB Monitor Board with reference to [7.2 Installation of a USB Driver, and recognition of USB
Monitor Board (Manual setup)].
3.4.1 Recognition of USB Monitor Board 1 (for USBMON Driver)
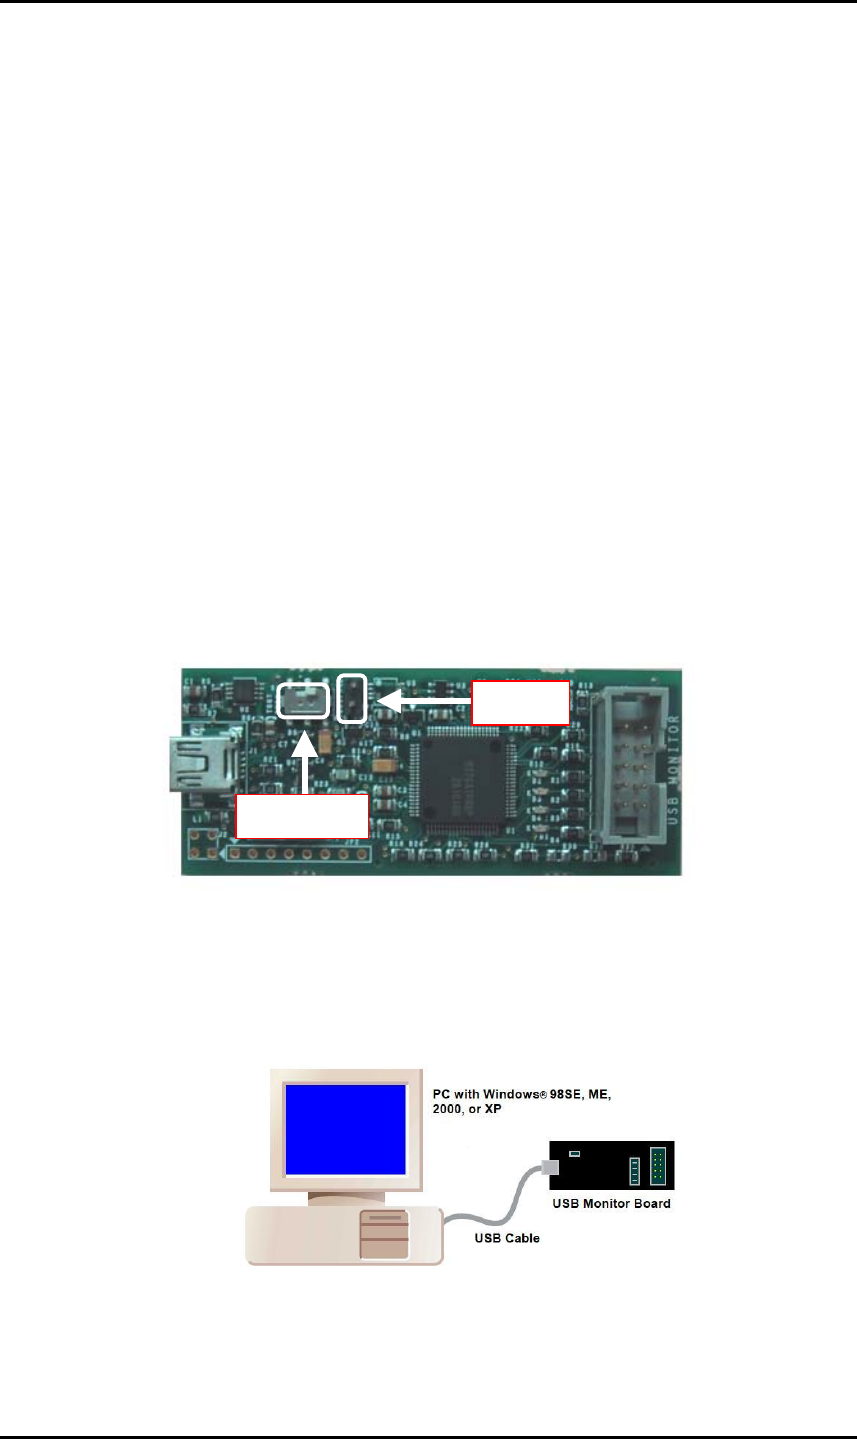
1) Remove the cover of USB Monitor Board and make a USB Monitor Board (Board) the following
setup, before connecting USB Monitor Board to your host computer (PC). If a setup is completed,
attach a cover in a USB Monitor Board (Board).
Power Source Supply Selector (S1: Power Mode): USB side
MCU Mode Pin (JP1: MCU Mode): Open
Open
USB side
Figure 3-1 Setup of USB Monitor Board (Board)
2) Connect the USB Monitor Board included with the package to the USB port of PC. The Power
indicator (D1: Power) of USB Monitor Board lights, and a Status indicator (D4: Status) blinks.
Figure 3-2 USB Monitor Board connectivity
18
