


Riverstone Networks RS 2100 Switch Router Getting Started Guide 4-1
4 RS 2100 INITIAL CONFIGURATION
This chapter provides the following information on powering up the RS 2100 for the first time, and performing
basic setup procedures. Basic setup include:
• Powering on the RS 2100 and booting the software
• Starting the Command Line Interface (CLI)
• Activating and saving configuration changes
• Assigning passwords
• Using the CLI to add an IP interface, subnet mask, and default gateway
• Setting up SNMP
• Assigning a DNS server(s) to the RS 2100
• Configuring the SYSLOG server and server message levels
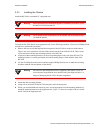
4.1 POWERING ON THE RS 2100
To power on the RS 2100 perform the following steps:
1. Make sure all exposed line card slots are free of foreign objects such as tools and are covered
with blanks.
2. Make sure that the RS 2100’s DB-9 console port is connected to an active terminal or a PC
running terminal emulation software.
Note The RS 2100 does not have a power ON/OFF switch. The RS 2100 is turned
on by plugging in its AC power cords and connecting them to the AC source
3. Plug the AC power cords into the RS 2100 chassis, then connect the RS 2100 to the AC power
source.
If this is the first time you have powered on the RS 2100, it boots automatically using the software image on
the internal flash memory. While the software is booting, the amber Offline LED on the front of the RS 2100
is lit. When the software finishes booting, the Offline LED goes dark and the green Online LED lights up,
indicating that the Rapid Operating System (ROS) software is online.
In addition, as the software boots, the management terminal or PC attached to the RS 2100’s DB-9 DCE port
displays messages related to the phases of the boot sequence.