


33
3-2 Mounting the Scan Object
3. Creating 3D Data
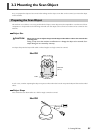
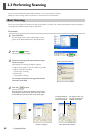
Mounting the Scan Object
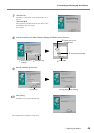
Choose the object to be scanned, then mount the scan object.
CAUTION
Securely fasten the object to be scanned to the table so that it does not slip or topple
over.
The table rotates during scanning. Tipover or contact by the scan object may cause damage.
Scan-object damage is not covered by warranty.
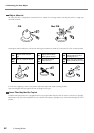
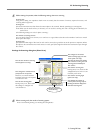
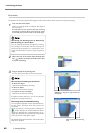
The table rotates during scanning. Using double-sided tape, clay, or the like, fasten the object in place securely so that it
will not fall over or slip. Any slipping of the object makes correct scanning impossible.
When the object to be scanned has areas with cavities or voids, mounting the object at an orientation that allows the laser
beam to pass through the cavities, as shown in the figure, makes scanning easier.
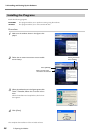
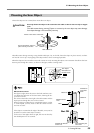
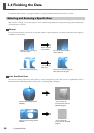
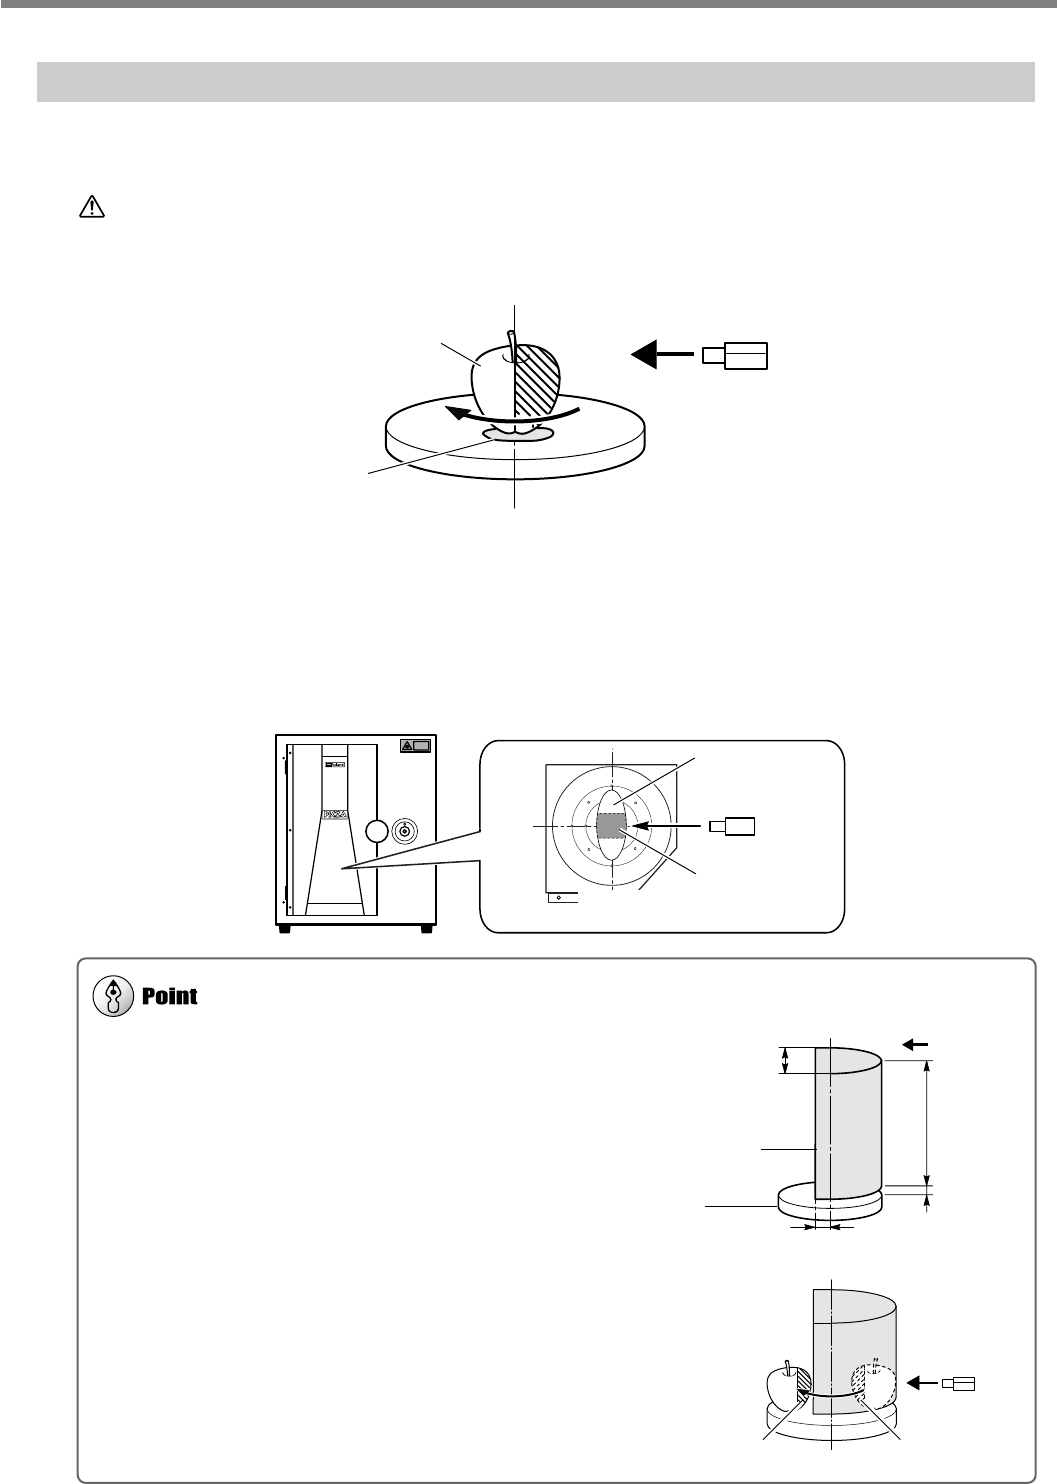
Effective Sensor Area
The figure at right shows the area in which the machine's sen-
sors detect the reflection of the laser beam, allowing the ob-
ject to be scanned.
The surfaces that reflect laser light as the table rotates and the
object passes through this area can be scanned.
When scanning an object that is considerably uneven, or that
is crank-shaped, you may need to take this effective sensor
area into account.
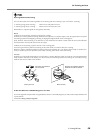
If the object is mounted at the edge of the table, it may not be
possible to scan the entire object correctly.
In the case of the apple shown at right, the area enclosed by
the shaded portion is not scanned.
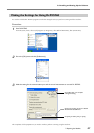
304.8 mm
3 mm
203.2 mm
10 mm
Secure the bottom surface in
place with clay or the like.
Table
Mount in the center of the table.
Table centerline
Cavity
Table
Scan object
Orientation of
the laser beam
Effective Sensor
Area
Table
Orientation
of the laser
beam
Not reached by the
laser beam
Outside the effective
sensor area
Not OK