3. Creating 3D Data
40
3-4 Finishing the Data
Procedure
You perform rescanning using the following procedure. The windows shown are those for plane rescanning.
1
First, scan the entire object.
Choose a scanning mode according to the shape of
the scan object.
From this point on, never open the door until rescanning
ends. Doing so switches off the power. Scanning cannot
be resumed when you then switch on the power again.
2
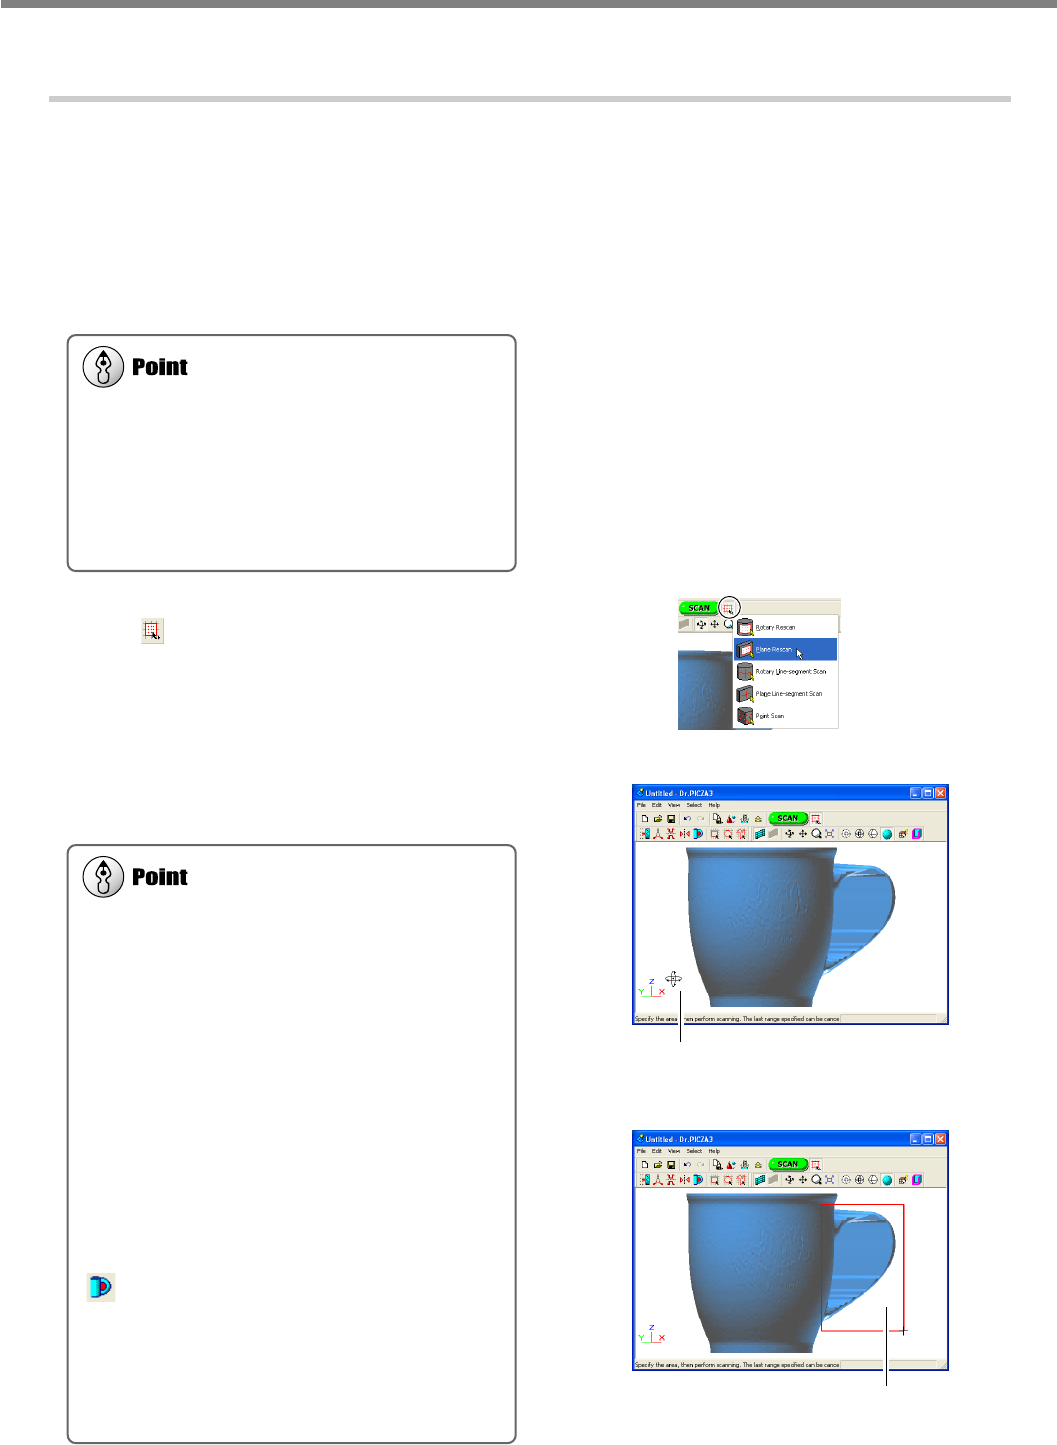
When the scan of the entire object finished, click
the [ ] button to choose the method you want
to use for rescanning.
3
Drag to specify the rescanning area.
You can specify more than one rescanning area.
Shortcut Keys for Shifting the Perspective
• To Rotate the Object
Hold down the SPACE key and drag
• To Move the Object
Hold down the Ctrl key and drag
• To expand and reduce the Object
Hold down the shift key and drag
In addition to these shortcuts, you can also shift the
perspective using the arrow keys.
Delineating Areas That Need Rescanning
You can remove improper surfaces that shouldn't ex-
ist and clearly delineate areas that need to be
rescanned.
Before you specify a rescanning area, clicking the [
] button displays the "Delete Abnormal Faces"
dialog box. Running this command deletes, for ex-
ample, the abnormal surface produced on the handle
of the cup shown in the figure at right.
For detailed information about this, refer to the online
help for Dr. PICZA3.
Shortening the Scanning Time by Performing
Basic Scanning at a Coarse Pitch
You can speed up operations during basic scanning
by scanning at a coarse pitch. For line scanning and
point scanning in particular, it is a good idea to scan
at the minimum pitch necessary to get the general
shape.
SPACE key + drag left or right to shift the
perspective.
Drag to specify the rescanning
area.


