


Installation
18 Runco VX-44d/-55d Installation/Operation Manual
PRE
L
IMINAR
Y
3.2
Quick Setup
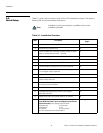
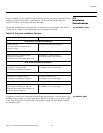
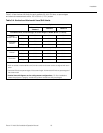
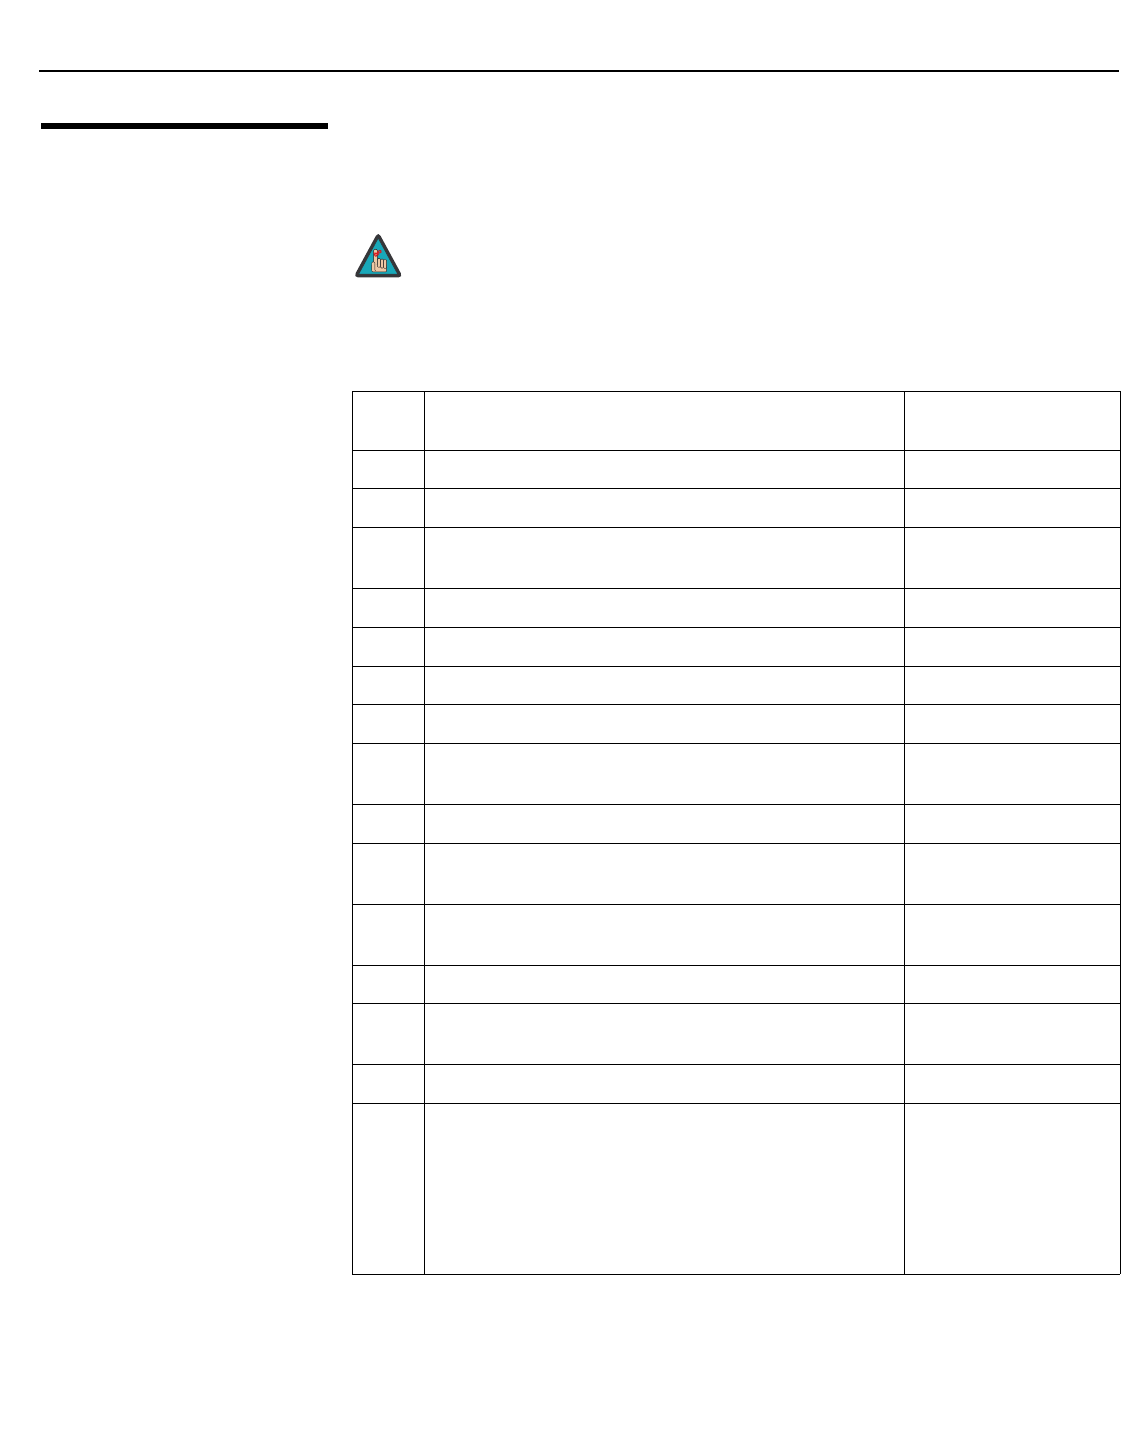
Table 3-1 gives a quick overview of the VX-44d/-55d installation process. The sections
following this one provide detailed instructions.
Installation must be performed by a qualified custom video
installation specialist.
Table 3-1. Installation Overview
Step Procedure
For Details, Refer to
page...
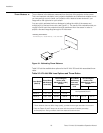
1 Choose a location for the projector 19
2 Install primary projection lens 25
3 Install CineWide lens mounting assembly (stationary base
plate or AutoScope lens motor – optional)
26
4 Mount the projector 28
5 Connect the DHD Controller to the projector 29
6 Connect signal sources to the DHD Controller 30
7 Connect external controller to RS-232 port (optional) 36
8 Connect AutoScope lens motor and/or other equipment to
12-volt trigger outputs (optional)
37
9 Apply power to the projector 39, 40
10 Primary lens adjustments: projected image size (zoom),
position (shift) and focus
21, 41
11 For rear-screen and/or ceiling-mount installations, select
the proper picture orientation
41
12 Install CineWide anamorphic lens (optional) 42
13 CineWide lens adjustments: position, pitch (angle),
geometry and focus
43
14 Adjust lamp output and optical aperture, as needed 49
15 DHD Controller input calibration: adjust the following for
each DHD Controller input and display mode (resolu-
tion/frame rate); save settings when finished:
• Aspect ratio • Color level
• Brightness • Tint
• Contrast • Input position
• Color temperature and white balance
55 through 69
Note